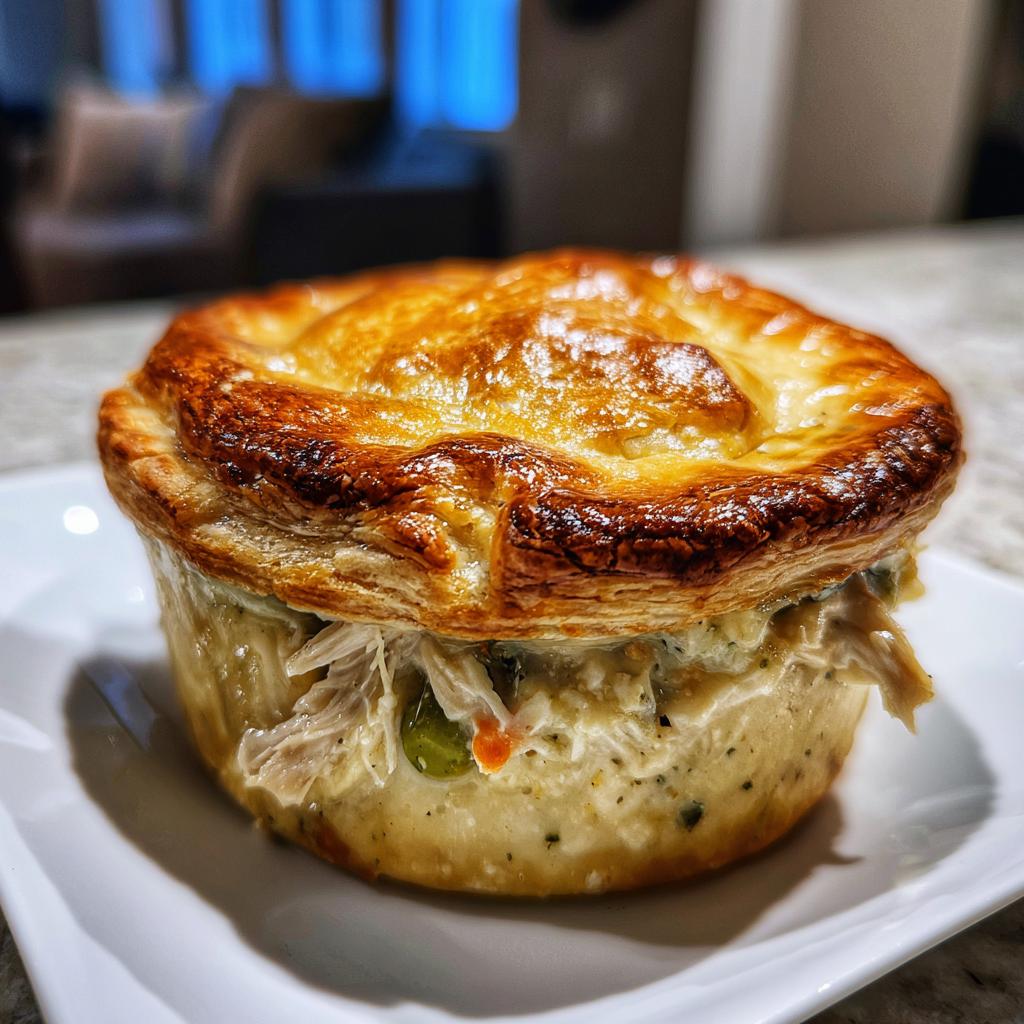
Irresistible Mini Chicken Pot Pies in Just 25 Minutes
Oh my goodness, let me tell you about my absolute favorite weeknight lifesaver – these mini chicken pot pies! There’s something magical about that flaky crust giving way to creamy, savory filling that just hits all the comfort food buttons. I’ve been making these little guys for years (after what my family calls my “great pot pie experiment of 2018” where I tested about a dozen versions). What I love most is how they turn basic ingredients into something special with minimal effort. Seriously, if you can stir a skillet and roll out dough, you’re golden. They’re perfect for when you want that homemade pot pie experience without waiting for a big one to bake. And the best part? Everyone gets their own adorable personal pie – no fighting over the crispy edges!
Why You’ll Love These Mini Chicken Pot Pies
Let me count the ways these little pies will steal your heart! I’m not exaggerating when I say they check every box:
- Perfect portion control – No more sad, soggy leftovers! Each person gets their own golden-crusted masterpiece with just the right amount of creamy filling.
- Endless customization – Swap in whatever veggies you’ve got (I’ve used everything from peas to zucchini) or add a dash of hot sauce when you’re feeling spicy.
- Meal prep magic – They freeze like a dream! I always make extras for those “I can’t even” weeknights.
- Crowd-pleasing power – Kids go nuts for their own mini pie, and adults appreciate the nostalgia factor. Win-win!
Trust me, once you try this method, you’ll never go back to big pot pies again!
Ingredients for Mini Chicken Pot Pies
Okay, let’s talk ingredients – and I promise, nothing too fancy here! You probably have most of this in your kitchen already. I’ve broken it down so you can see exactly what goes into that dreamy filling versus that buttery crust. Pro tip: I always gather everything on the counter before starting (my grandma called this “mise en place” to sound fancy, but really it just means less frantic running to the fridge mid-recipe!).
For the Filling:
- 2 cups cooked chicken, shredded – Rotisserie chicken works wonders here (no shame in the store-bought game!)
- 1 cup frozen mixed vegetables – The classic peas-and-carrots combo never fails, but use whatever mix you love
- 1/2 cup diced onion – Yellow onions are my go-to for that sweet, mellow flavor
- 1/4 cup butter – Unsalted, please! We’ll control the salt ourselves
- 1/4 cup all-purpose flour – This is our magic thickener for that luscious sauce
- 1 1/2 cups chicken broth – Low-sodium if possible, so we can season to taste
- 1/2 cup milk – Whole milk makes the creamiest sauce, but 2% works in a pinch
- 1/2 teaspoon salt – We’ll adjust later if needed
- 1/4 teaspoon black pepper – Freshly ground if you’ve got it!
For the Crust:
- 1 package refrigerated pie crusts (2 crusts) – Look for the standard 14-15 oz box in the dairy section. Each package contains two ready-to-roll crusts – one for bottoms, one for tops!
How to Make Mini Chicken Pot Pies
Alright, let’s get to the fun part – making these adorable little pies! I promise it’s easier than you think. Just follow these simple steps, and you’ll have golden, flaky perfection in no time. I’ve broken it down so even if you’re a beginner, you’ll feel like a pro by the end!
Prep the Filling
First things first – that creamy, dreamy filling! Grab your favorite skillet (I use my trusty cast iron) and melt the butter over medium heat. When it’s just starting to bubble, toss in those diced onions. You’ll want to cook them until they’re soft and translucent – about 3-5 minutes should do it. That sweet oniony smell? That’s how you know you’re on the right track!
Now, sprinkle in the flour and whisk it into the butter and onions. This is our roux – the magic thickener! Cook it for exactly 1 minute (I set a timer) to get rid of that raw flour taste. It should look like a pale golden paste at this point. Then, slowly pour in the chicken broth and milk while whisking constantly. Keep whisking until the sauce thickens enough to coat the back of a spoon – this usually takes about 2-3 minutes. The transformation from thin liquid to luscious gravy always feels like kitchen wizardry to me!
Finally, stir in your shredded chicken and frozen veggies. The heat from the sauce will thaw those veggies perfectly. Give it a taste and adjust the salt and pepper if needed. Set this aside to cool slightly while we work on the crust.
Assemble the Pies
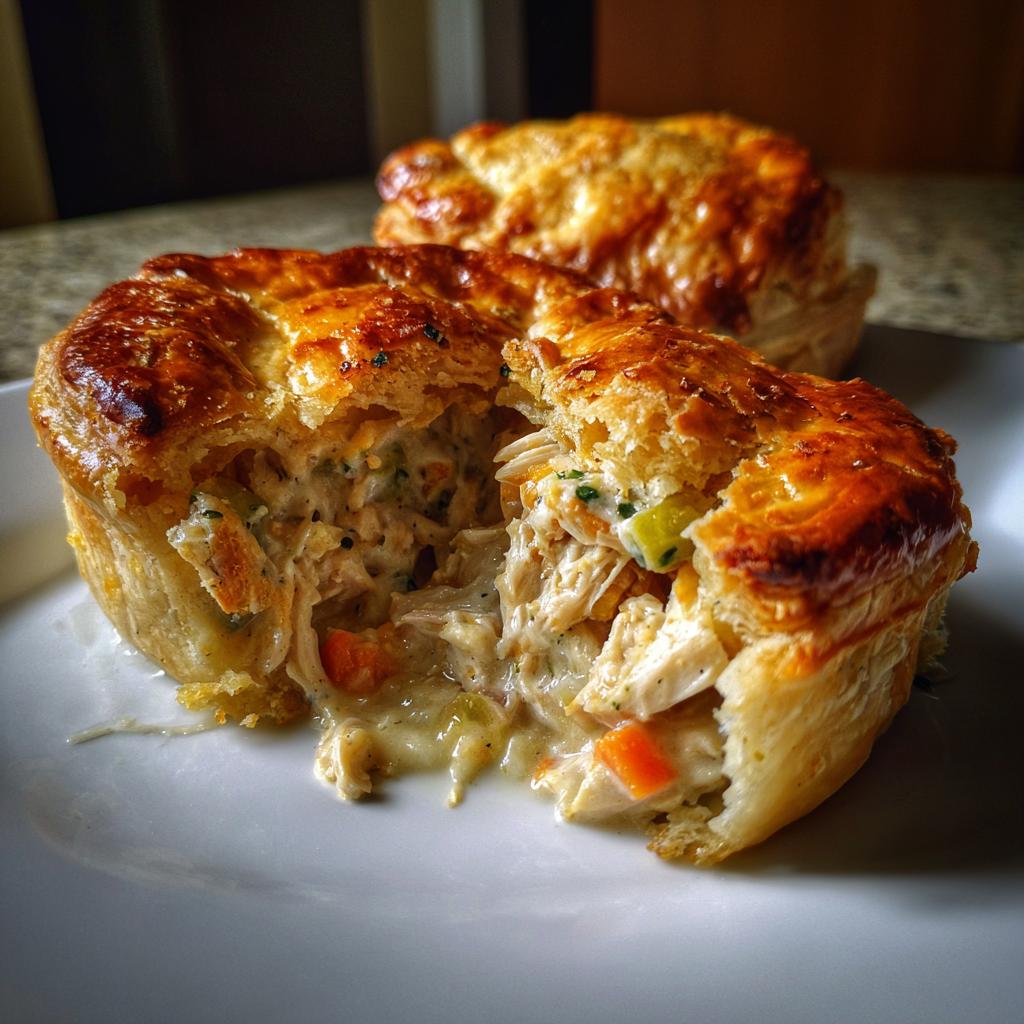
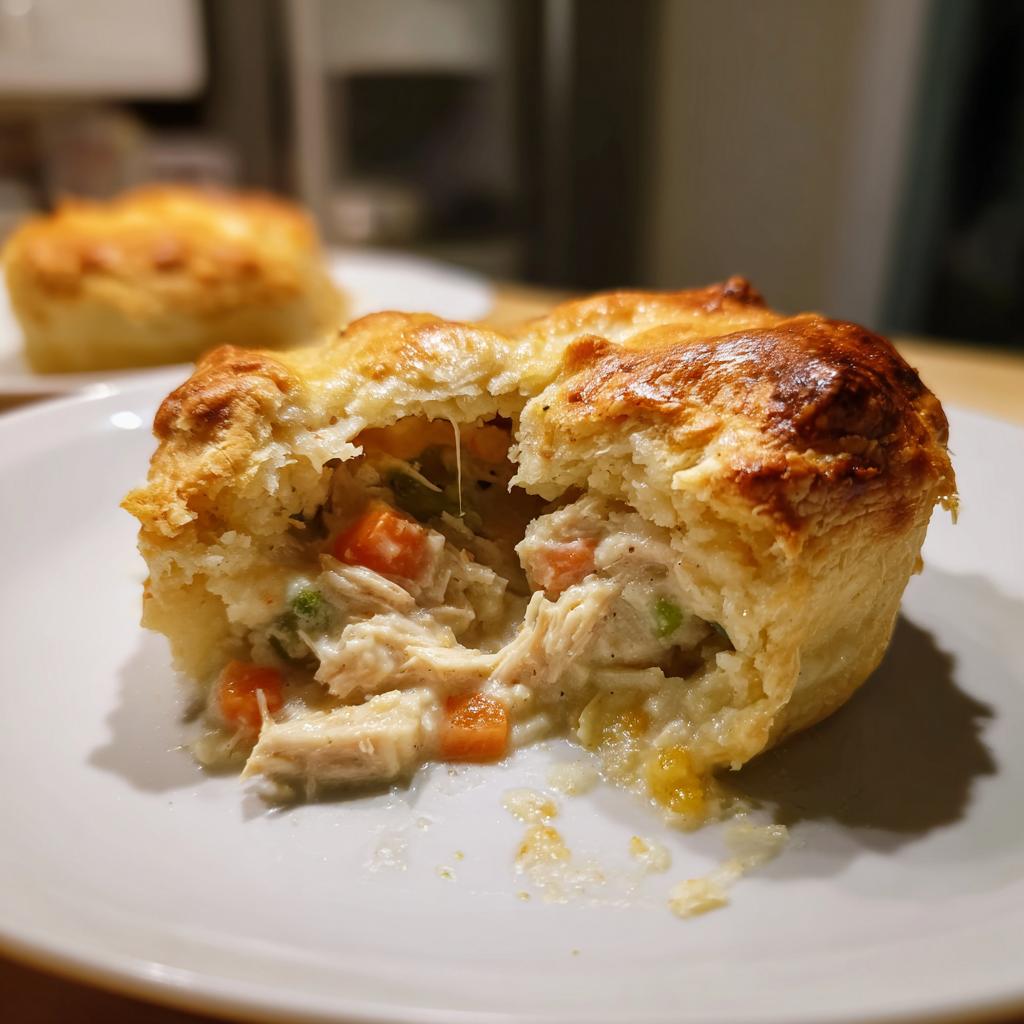
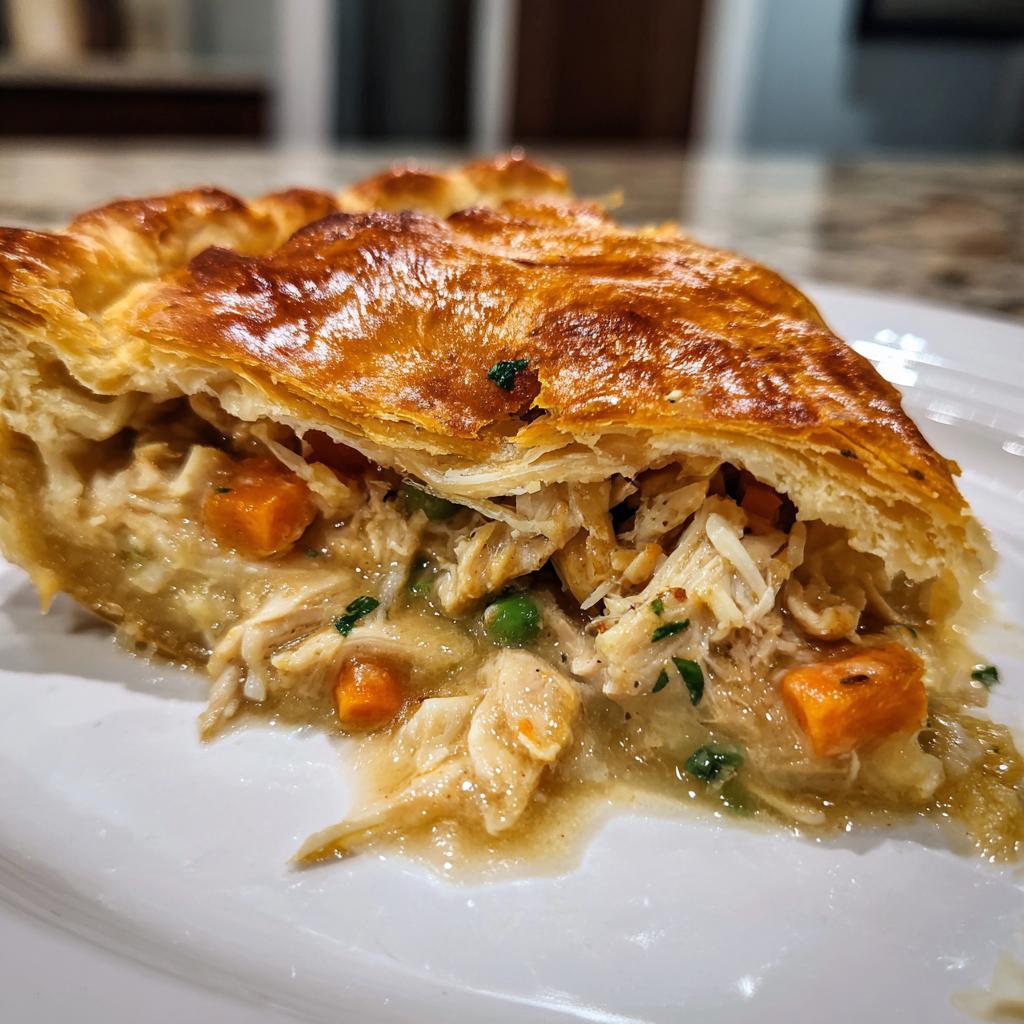
Time to play with dough! Unroll your pie crusts on a lightly floured surface. I use a 3.5-inch round cutter (a wide-mouth mason jar lid works great too!) to cut circles from the crusts. You’ll get about 6 circles from each crust – reroll the scraps if needed. Lightly grease your muffin tin (I use butter, but cooking spray works too), then gently press each crust circle into a muffin cup. Don’t worry if it’s not perfect – rustic is charming!
Now, spoon that gorgeous filling into each crust-lined cup, filling almost to the top. For the tops, you can either cut more circles (slightly smaller than the bottoms) and press them on, or get fancy with lattice strips! Just be sure to crimp the edges or press with a fork to seal. I always poke a couple small holes in the tops with a knife to let steam escape – this prevents “pot pie volcanoes” in your oven!
Bake to Perfection
Pop those beauties into a preheated 375°F oven. Now, the hardest part – waiting! Set your timer for 25 minutes, but don’t wander too far. What we’re looking for is that perfect golden-brown crust. If after 25 minutes they’re not quite there, give them another 5 minutes. Oh, and that heavenly smell wafting through your kitchen? That’s the universal sign of comfort food success!
Carefully remove them from the oven (that filling is HOT) and let them cool in the tin for about 5 minutes before gently loosening with a butter knife. Transfer to a wire rack if you can wait that long – but in my house, we’re usually digging in straight from the pan with a fork!
Mini Chicken Pot Pie Tips for Success
After making hundreds of these little pies (seriously, I might have a problem), I’ve picked up some foolproof tricks to guarantee pot pie perfection every time:
- Grease that tin like your life depends on it – I use butter for flavor, but cooking spray works too. Get into every nook and cranny to prevent crust-sticking disasters.
- Let the filling take a breather – 5-10 minutes of cooling prevents a molten lava situation and helps the crust stay crisp.
- Vent, vent, vent! Those little knife slits in the top crust aren’t just cute – they’re your insurance against soggy tops and filling explosions.
- Rotate halfway through baking – For even browning, give the pan a 180-degree turn at the 15-minute mark.
Follow these, and you’re basically guaranteed golden, flaky success!
Mini Chicken Pot Pie Variations
Oh, the possibilities! One of my favorite things about this recipe is how easily you can mix it up. Here are some delicious twists I’ve tried when the mood strikes (or when my fridge needs cleaning out):
- Turkey twist – Leftover Thanksgiving turkey makes an amazing swap for chicken. Add a pinch of sage for that holiday flavor.
- Fresh veggie power – Instead of frozen, toss in diced fresh carrots, celery, and mushrooms when sautéing the onions.
- Herb it up – A teaspoon of thyme or rosemary adds wonderful depth. Garlic lovers – mince a clove to cook with the onions!
- Cheesy goodness – Fold in a handful of shredded cheddar when mixing the filling for extra richness.
Honestly? There’s no wrong way to make these little pies your own! If you are looking for more savory inspiration, check out our general recipe blog.
Serving and Storing Mini Chicken Pot Pies
Nothing beats a piping hot mini pot pie fresh from the oven! I love serving these with a crisp green salad or roasted veggies – the perfect comfort food balance. Got leftovers? (Lucky you!) They keep beautifully in the fridge for up to 3 days. Just reheat at 350°F until warm and crispy again. Pro tip: Freeze unbaked pies wrapped tight in foil – they’ll be your secret weeknight dinner weapon for months!
Mini Chicken Pot Pie FAQs
I get asked these questions ALL the time – and believe me, I’ve tested every scenario in my kitchen! Here are the answers to the most common pot pie puzzlers:
Can I freeze mini chicken pot pies?
Absolutely! In fact, I always make extra for the freezer. For best results, assemble them completely but don’t bake. Freeze solid on a baking sheet first, then transfer to freezer bags. When that craving hits, bake from frozen – just add 5-10 extra minutes. They’ll taste just as amazing months later!
Can I use puff pastry instead of pie crust?
Oh yes, and it’s delicious! Puff pastry gives you those gorgeous flaky layers. Just roll it slightly thinner than pie crust and reduce baking time to about 20 minutes – keep an eye on it since puff pastry browns faster. The filling stays the same, so you’re really just swapping the wrapping!
How do I prevent soggy bottoms?
This was my nemesis for ages until I cracked the code! Two tricks: 1) Lightly pre-bake the bottom crusts for 5 minutes before adding filling (we call this “blind baking”), or 2) Make sure your filling isn’t too watery before assembling. That flour-butter roux should be nice and thick – it’ll absorb moisture as it bakes.
Can I make these ahead of time?
You bet! The filling keeps beautifully in the fridge for 2 days (the flavors actually improve!). When ready, just assemble with fresh crust and bake. For parties, I often prep everything the day before and pop them in the oven when guests arrive – the smell alone gets compliments!
What’s the best way to reheat leftovers?
The oven is your friend here! 350°F for about 10 minutes brings back that perfect crispiness. Microwaving works in a pinch, but the crust won’t be as dreamy. I like to sprinkle a few drops of water on top before reheating to keep the filling moist.
Nutritional Information
Now, let’s chat about nutrition – but keep in mind, these numbers are just estimates! Your exact mini chicken pot pies might vary depending on the brands you use and any tweaks you make (like adding extra cheese – no judgment here!). The beauty of homemade is you control what goes in, so you can adjust to fit your needs.
Generally speaking, each little pie gives you a nice balance of protein from the chicken, some veggie goodness, and that irresistible flaky crust. They’re hearty enough to be satisfying but portion-controlled so you don’t overdo it. If you’re watching certain nutrients, you can easily swap in low-sodium broth or whole wheat crust – I’ve done both with great results! If you want to see more of my recipe ideas, feel free to check out my Pinterest profile.
Remember, comfort food is about joy as much as nutrition. These mini pot pies deliver on both counts in my book!
Final Thoughts
There you have it – my foolproof path to mini chicken pot pie bliss! I’d love to hear how yours turn out. Did you stick with the classic recipe or put your own spin on it? Snap a photo and tag me – nothing makes me happier than seeing your kitchen creations! Now go forth and bake up some comfort!
Print
Irresistible Mini Chicken Pot Pies in Just 25 Minutes
- Total Time: 50 mins
- Yield: 12 mini pies 1x
- Diet: Low Lactose
Description
Mini chicken pot pies are a delicious and easy-to-make comfort food perfect for any occasion. These individual-sized pies are packed with tender chicken, vegetables, and a creamy sauce, all wrapped in a flaky crust.
Ingredients
- 2 cups cooked chicken, shredded
- 1 cup frozen mixed vegetables
- 1/2 cup diced onion
- 1/4 cup butter
- 1/4 cup all-purpose flour
- 1 1/2 cups chicken broth
- 1/2 cup milk
- 1/2 teaspoon salt
- 1/4 teaspoon black pepper
- 1 package refrigerated pie crusts (2 crusts)
Instructions
- Preheat oven to 375°F (190°C).
- Melt butter in a skillet over medium heat. Add onion and cook until soft.
- Stir in flour, salt, and pepper. Cook for 1 minute.
- Gradually add chicken broth and milk, stirring until thickened.
- Add chicken and mixed vegetables. Stir to combine.
- Unroll pie crusts and cut into circles to fit your muffin tin.
- Press crust circles into greased muffin tin cups.
- Fill each crust with chicken mixture.
- Top with remaining crust circles or lattice strips.
- Bake for 25-30 minutes until golden brown.
Notes
- Use rotisserie chicken for easy prep.
- You can use homemade or store-bought pie crust.
- Freeze unbaked pies for quick meals later.
- Prep Time: 20 mins
- Cook Time: 30 mins
- Category: Main Dish
- Method: Baking
- Cuisine: American
Nutrition
- Serving Size: 1 mini pie
- Calories: 320
- Sugar: 2g
- Sodium: 450mg
- Fat: 18g
- Saturated Fat: 8g
- Unsaturated Fat: 8g
- Trans Fat: 0g
- Carbohydrates: 25g
- Fiber: 2g
- Protein: 15g
- Cholesterol: 45mg