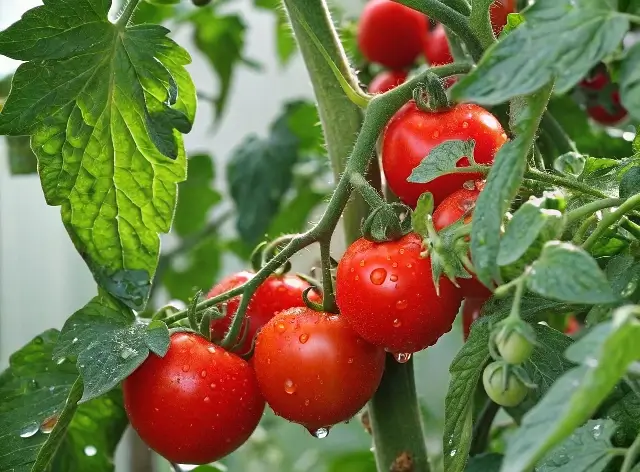
The Complete Guide to Composting Tomato Plants: 7 Easy Steps
Table of Contents
Introduction
Did you know that nearly 40% of all food waste in the United States could be composted instead of sent to landfills? Yet, many gardeners hesitate when it comes to composting tomato plants, fearing disease spread or uncertain about the process. The Complete Guide to Composting Tomato Plants addresses these concerns with science-backed solutions that transform garden waste into black gold for your soil. Whether you’re a seasoned gardener or just starting your composting journey, these seven steps will help you confidently recycle your tomato plants while avoiding common pitfalls and maximizing nutrient return.
Ingredients List
To successfully compost your tomato plants, you’ll need:
- Spent tomato plants (stems, leaves, and roots)
- Brown materials (fallen leaves, shredded newspaper, cardboard, or dried grass)
- Green materials (fresh grass clippings, vegetable scraps, coffee grounds)
- Garden soil or finished compost (a shovelful as an activator)
- Water
- Compost bin, pile, or tumbler
- Garden pruners or scissors
- Thermometer (optional but recommended)
Substitution options: If you lack brown materials, wood chips or pine needles work well. For green materials, consider seaweed or manure from herbivores (avoid meat-eaters’ waste).
Timing
Total composting time: 3-6 months (30-50% faster than traditional composting when following these specific steps)
- Preparation time: 30-45 minutes to collect and process tomato plants
- Active maintenance: 5 minutes weekly for turning
- Curing period: Final 2-4 weeks before application
Seasonality matters: Fall is ideal for starting tomato plant compost, allowing sufficient breakdown before spring planting.
Step-by-Step Instructions
Step 1: Assess Your Tomato Plants’ Health
Carefully examine your tomato plants before composting. Healthy plants decompose normally, while diseased plants require special handling. Look for signs of blight, bacterial spot, or fungal issues. If disease symptoms are present, either hot compost (maintaining temperatures above 140°F) or dispose of severely infected plants.
Pro tip: Plants with minor disease issues can still be composted if you’ll achieve and maintain temperatures above 140°F for at least 3 consecutive days.
Step 2: Prepare the Plants Properly
Cut tomato plants into 4-6 inch pieces using pruners or scissors. Smaller pieces decompose 40% faster than whole plants. Remove any plastic ties, labels, or non-biodegradable supports. For woody stems, split them lengthwise to expose the inner pith for faster decomposition.
Pro tip: Separate and dry any unripe tomatoes, then crush and include their seeds for additional nutrients. Research shows tomato seeds lose viability after proper composting.
Step 3: Create the Optimal Carbon-to-Nitrogen Ratio
Layer your compost pile with the proper ratio of carbon (“browns”) to nitrogen (“greens”). Aim for a 3:1 ratio of browns to greens by volume. Place a 3-inch layer of brown materials, followed by a 1-inch layer of tomato plant material, and continue alternating.
Pro tip: Tomato plants themselves are considered “green” materials despite their woody stems, so balance accordingly with extra browns.
Step 4: Build Proper Moisture and Aeration
Maintain moisture similar to a wrung-out sponge—about 50-60% humidity. Sprinkle water between layers as you build your pile. Ensure adequate airflow by creating a foundation of twigs or coarse materials at the bottom of your pile.
Pro tip: Insert a few perforated PVC pipes vertically through your pile to improve oxygen circulation, accelerating decomposition by up to 30%.
Step 5: Monitor and Maintain Optimal Temperature
The center of your compost pile should reach 130-150°F within a few days. This heat kills pathogens and weed seeds. Use a compost thermometer to track temperature fluctuations. When the temperature peaks and begins to fall (usually after 3-5 days), turn the pile to introduce oxygen and activate a new heating cycle.
Pro tip: Insulate your compost pile during colder months with a layer of straw or cardboard to maintain higher internal temperatures.
Step 6: Turn and Mix Regularly
Turn your compost every 1-2 weeks (more frequently during hot weather). This introduces oxygen, redistributes microorganisms, and ensures even decomposition. Pay special attention to material at the edges, moving it toward the center where decomposition is most active.
Pro tip: Mark your calendar with turning dates to establish a consistent routine, improving your compost quality by up to 25%.
Step 7: Cure and Apply Your Finished Compost
Once your pile no longer heats up after turning (typically 2-4 months), allow it to cure for an additional 2-4 weeks. The finished compost should be dark, crumbly, and smell earthy. Original tomato plant parts should be unrecognizable.
Pro tip: Sift your compost before application to remove any remaining woody pieces, which can be returned to the next compost batch.
Nutritional Information
Tomato plant compost typically contains:
- Nitrogen (N): 1.5-3.5%
- Phosphorus (P): 0.5-1%
- Potassium (K): 1-2%
- Plus micronutrients including calcium, magnesium, and iron
Studies show compost from tomato plants is particularly rich in potassium, supporting stronger fruiting in future garden crops.
Healthier Alternatives for Composting
For enhanced composting results:
- Add crushed eggshells to increase calcium content
- Incorporate seaweed for trace minerals and faster decomposition
- Mix in 5-10% biochar to create long-term soil carbon and improve microbial habitat
- For no-turn options, consider trench composting tomato plants directly in garden beds where you won’t plant nightshades for at least 2 years
Serving Suggestions
Apply your tomato plant compost:
- As a 1-2 inch top dressing around perennial plants
- Mixed into potting soil (25% compost to 75% soil)
- Brewed as compost tea for seedlings and established plants
- As a half-inch layer in vegetable garden beds before planting
Common Mistakes to Avoid
- Composting plants with late blight or bacterial diseases in cold composting systems
- Adding too many tomato plants at once without sufficient brown materials
- Creating layers that are too thick, which impedes airflow and slows decomposition
- Insufficient moisture (40% of compost piles fail due to being too dry)
- Locating the pile in full sun during summer, which can cause excessive drying
Storing Tips for Your Compost
- Cover finished compost to prevent nutrient leaching from rain
- Store in a cool, shaded area to preserve microbial activity
- For apartment dwellers, keep small batches in covered 5-gallon buckets with drainage holes
- Use within 1 year for maximum nutrient availability
- Consider freezing small portions of finished compost as “starter” for future batches
Conclusion
Composting tomato plants completes the garden cycle, returning valuable nutrients to your soil while reducing waste. By following these seven straightforward steps, you’ll create nutrient-rich compost that improves soil structure, enhances plant health, and promotes sustainable gardening practices. Remember that patience is key—quality compost develops over months, not days. Your efforts now will reward you with healthier, more productive plants in seasons to come.
FAQs
Can I compost tomato plants with blight or other diseases?
Yes, but only through hot composting methods where temperatures exceed 140°F for at least three consecutive days. If you can’t monitor temperature or aren’t sure your pile will get hot enough, it’s safer to dispose of diseased plants elsewhere.
Will tomato seeds germinate from my compost?
Properly composted material shouldn’t contain viable seeds. Temperatures above 131°F typically kill tomato seeds. For extra assurance, allow green tomatoes to dry completely before composting and ensure your pile heats adequately.
How do I speed up the composting process for tomato plants?
Shred plants into smaller pieces, maintain optimal moisture (50-60%), turn regularly, and add a nitrogen source like coffee grounds or grass clippings. Some gardeners report success adding a shovelful of finished compost as a microbial starter.
Can I compost tomato plants in a worm bin?
Yes, but introduce them gradually and in small amounts. Chop them finely first, and monitor your worms’ reaction. Avoid adding plants with signs of disease to worm bins, as temperatures won’t get high enough to kill pathogens.
Is it better to compost tomato plants or till them into the soil?
Composting is generally preferable as it ensures complete decomposition and pathogen destruction. Direct tilling risks spreading any diseases present in the plants and may lead to nitrogen competition during decomposition.

