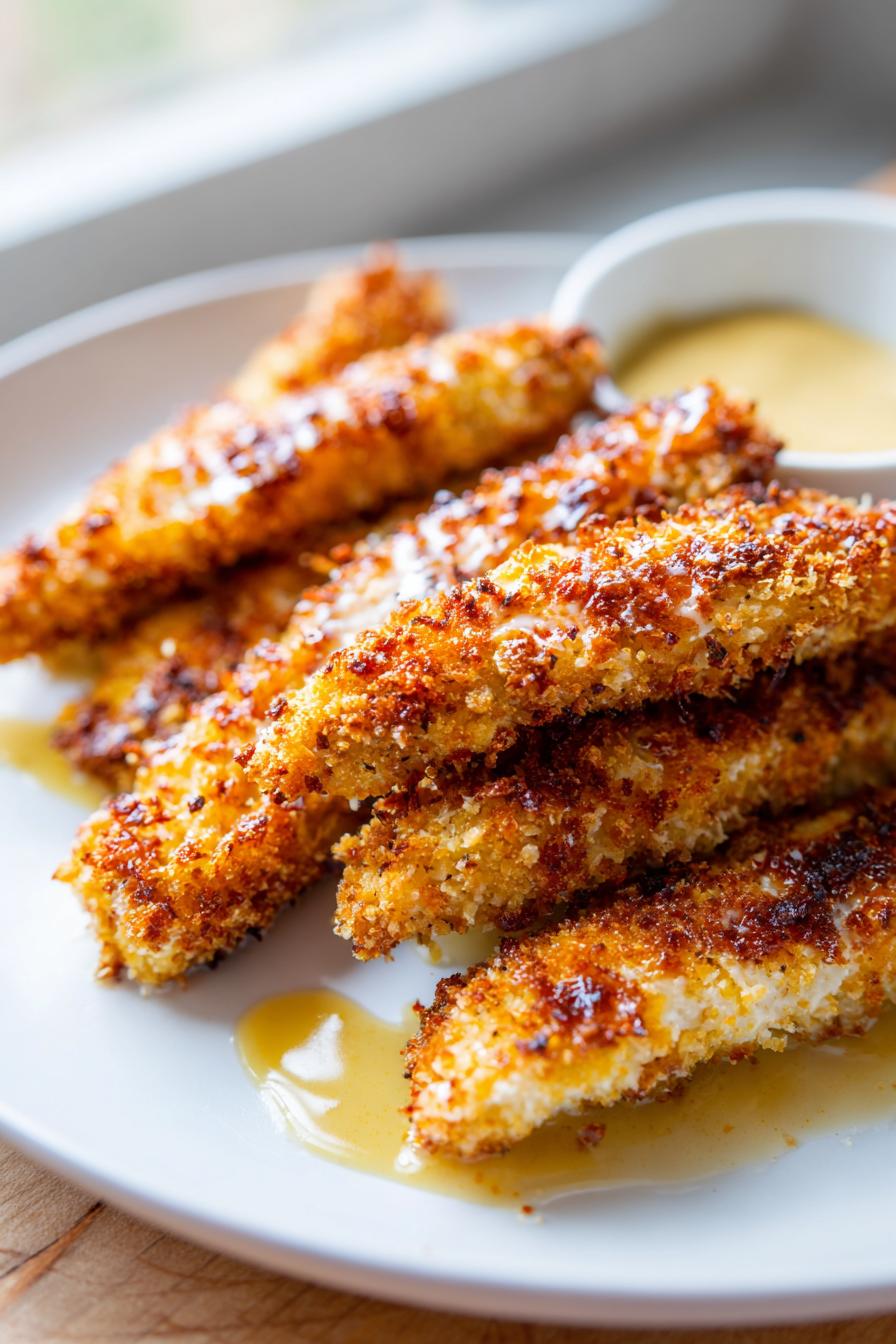
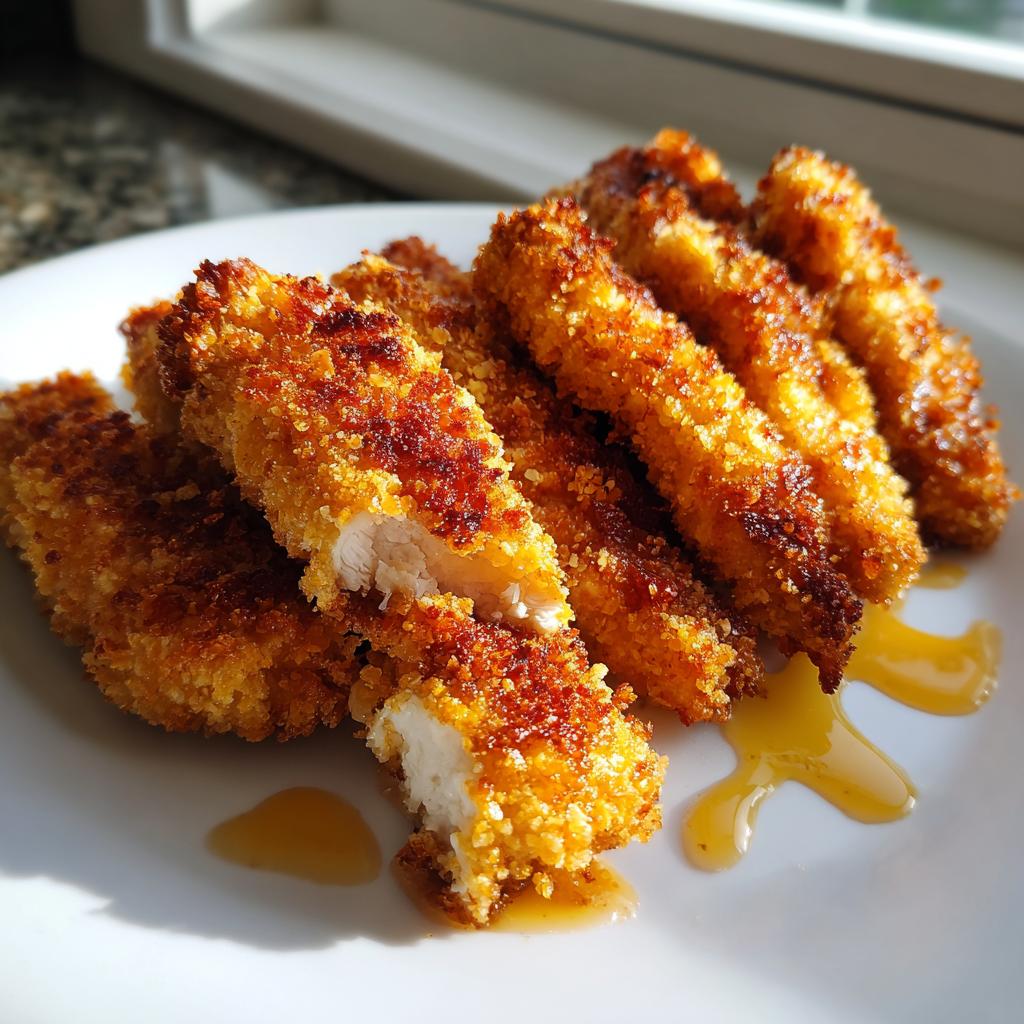
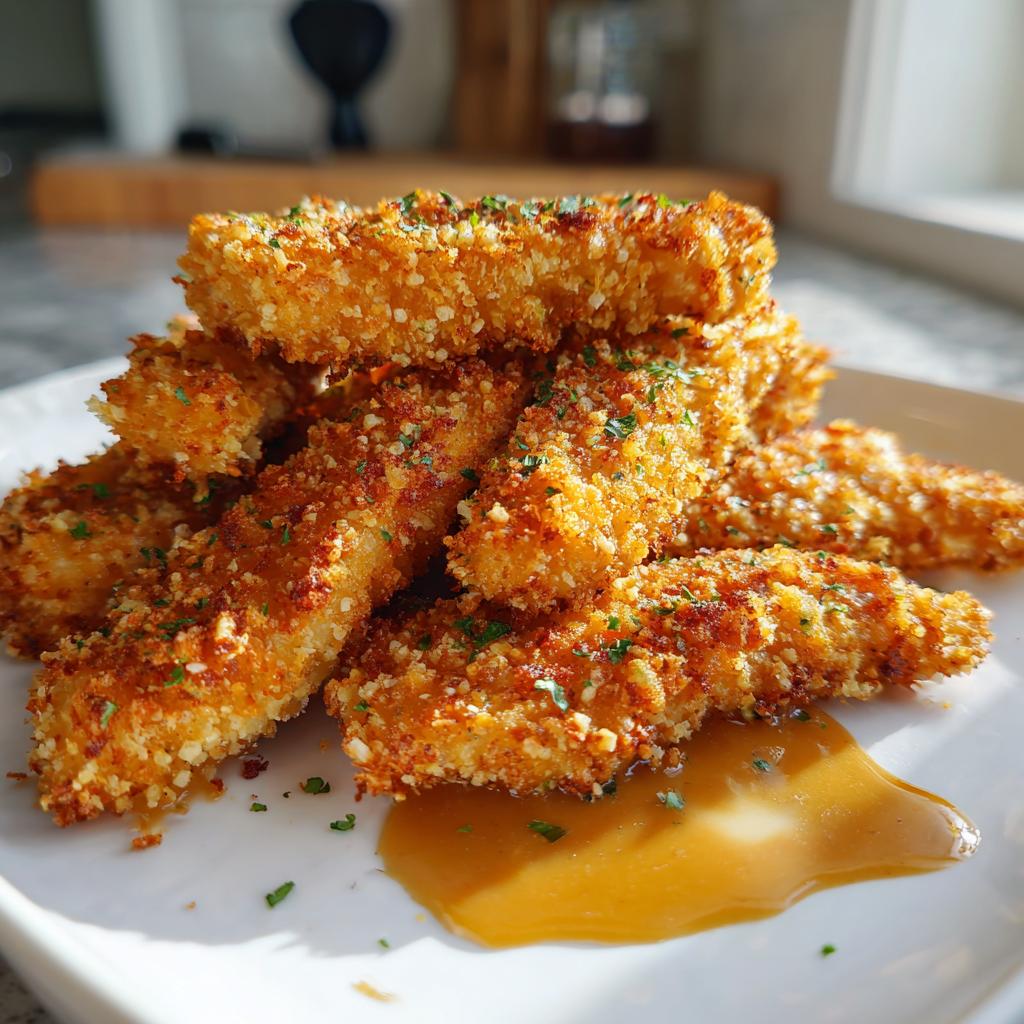
Crispy Homemade Baked Chicken Tenders: 30-Minute Golden Magic
Let me tell you about my absolute favorite weeknight lifesaver – crispy homemade baked chicken tenders! Now, I know what you’re thinking: “Baked? Really?” But trust me, these aren’t those sad, soggy chicken strips you might remember from school cafeterias. When I first started making these for my picky nephew (who swore he hated anything that wasn’t deep-fried), even he couldn’t tell the difference!
The magic happens when you get that perfect golden crust without all the oil. My secret? A killer breadcrumb-Parmesan mix that gets so crispy in the oven you’ll swear it’s fried. And the best part? You can have these ready faster than waiting for delivery. I’ve made these for everything from last-minute dinners to game day snacks, and they disappear every single time.
Ingredients for Crispy Homemade Baked Chicken Tenders
Okay, let’s gather our team players – these are the ingredients that’ll make magic happen in your oven! I’ve learned through many batches (and a few happy accidents) that quality matters here. You’ll need:
- 1 lb chicken tenders – or slice chicken breasts into strips if that’s what you’ve got
- 1 cup breadcrumbs – I’m partial to panko for that extra crunch, but regular works too
- 1/2 cup grated Parmesan cheese – the powdery kind from the green can works best here
- 1 tsp garlic powder – because everything’s better with garlic
- 1 tsp paprika – for that beautiful golden color
- 1/2 tsp salt – I use kosher salt for even distribution
- 1/2 tsp black pepper – freshly ground if you can
- 2 eggs – large ones, at room temperature
- 1/4 cup milk – any kind you have works
- 1 tbsp olive oil – just enough to help crisp things up
That’s it! Simple pantry staples that come together for something truly special. Now let’s get cooking!
How to Make Crispy Homemade Baked Chicken Tenders
Alright, let’s dive into the fun part – turning those simple ingredients into golden, crispy perfection! I’ve made this recipe so many times I could probably do it in my sleep, but I’ll walk you through each step so yours turn out just right.
Preparing the Coating
First things first – grab a medium bowl and dump in your breadcrumbs, Parmesan, garlic powder, paprika, salt, and pepper. Now here’s my little trick: use your fingers to mix everything together. You’ll feel when the spices are evenly distributed – no clumps of paprika hiding in there! The mixture should look like sandy, golden breadcrumbs with flecks of orange from the paprika. Set this aside while you prep the wet ingredients.
Coating the Chicken Tenders
In another bowl, whisk together the eggs and milk until they’re completely combined – no streaks of yolk remaining! Now comes the messy (but fun) part. Take each chicken tender and dunk it fully in the egg wash, letting the excess drip off for a second. Then roll it in the breadcrumb mixture, pressing gently to make sure every inch gets coated. I like to use one hand for wet ingredients and one for dry to avoid “breadcrumb fingers” (though my dog loves when I fail at this).
Baking to Perfection
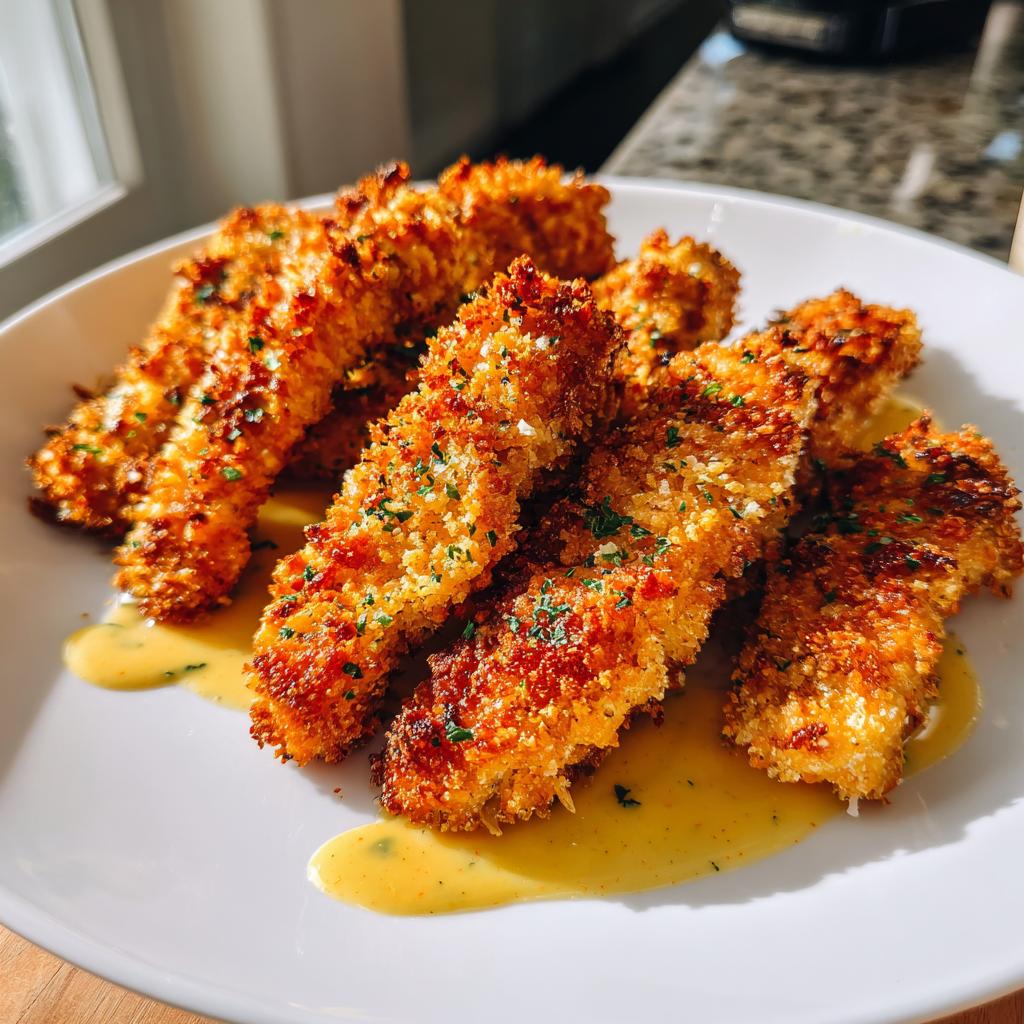
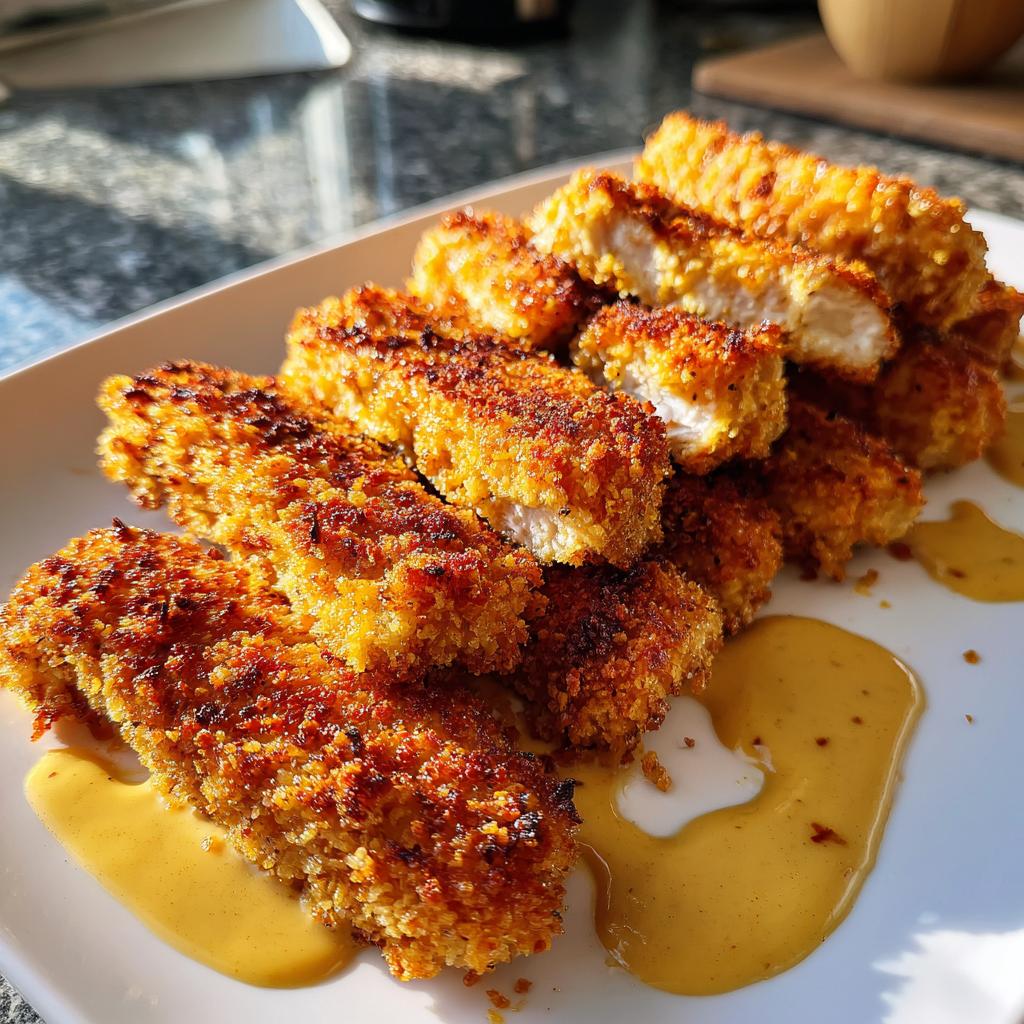
Preheat that oven to 400°F (200°C) – trust me, a hot oven is key for crispiness! Line a baking sheet with parchment paper (easy cleanup) and arrange your coated tenders with some space between them. Drizzle or brush lightly with olive oil – this helps them get that beautiful golden color. Bake for 10 minutes, then flip each tender carefully with tongs. Bake another 10-15 minutes until they’re crispy and reach an internal temperature of 165°F (74°C). The smell will drive you crazy!
Pro tip: If they’re not quite as brown as you’d like, broil for the last minute or two – just watch them like a hawk!
Why You’ll Love These Crispy Homemade Baked Chicken Tenders
Let me count the ways these golden beauties will become your new go-to! After years of testing (and eating), here’s why I’m obsessed:
- Healthier than fried – All that crunch without the oil bath? Yes please!
- Kid-approved magic – My pickiest eaters devour these (they never guess it’s baked)
- Weeknight lifesaver – From fridge to table in under 30 minutes when hunger strikes
- Customizable flavors – Swap spices to match your mood (I’ve got a smoky chipotle version I adore)
- Leftovers that stay crispy – Unlike soggy takeout, these reheat beautifully in the air fryer
Seriously, once you try homemade, those frozen bags just won’t cut it anymore! For more great dinner ideas, check out our blog.
Tips for the Best Crispy Homemade Baked Chicken Tenders
After burning (literally) through more batches than I’d like to admit, here are my hard-earned secrets for perfect tenders every time:
- Panko is your friend – Those Japanese-style breadcrumbs give you next-level crunch compared to regular ones
- Spray don’t drizzle – A quick spritz of cooking oil helps every inch get golden without pooling
- Dry chicken = crispy crust – Pat those tenders dry with paper towels before coating
- Space is key – Crowd the pan and they’ll steam instead of crisp up
- Flip with confidence – Use tongs halfway through baking to get even browning on both sides
Follow these and you’ll have tenders so crispy, no one will believe they’re baked! You can find more visual inspiration for recipes like this on our Pinterest page.
Variations for Crispy Homemade Baked Chicken Tenders
Oh, the possibilities! One of my favorite things about this recipe is how easily you can mix it up. Feeling spicy? Toss some cayenne into the breadcrumb mix – just a pinch wakes everything up beautifully. Need gluten-free? Almond flour works wonders for coating (though you might miss some crunch). For extra flavor, try mixing in some Italian seasoning or swapping half the Parmesan for Romano cheese. My neighbor swears by adding a tablespoon of ranch seasoning to the mix – her kids go wild for it!
Serving Suggestions for Crispy Homemade Baked Chicken Tenders
Now for the best part – loading up your plate with these golden beauties! My family goes wild when I serve these tenders with a trio of dipping sauces: classic honey mustard, tangy barbecue, and a creamy ranch. For weeknight dinners, I love pairing them with roasted sweet potato wedges and a crisp green salad – the perfect balance of textures. Game day? Stack them high with celery sticks and blue cheese dressing for dipping. And don’t even get me started on how amazing they are tucked into a toasted bun with pickles and slaw!
Storing and Reheating Crispy Homemade Baked Chicken Tenders
Here’s the good news – these tenders stay crispy even as leftovers! Let them cool completely, then tuck them into an airtight container with parchment between layers. They’ll keep in the fridge for 3 days (if they last that long!). When reheating, skip the microwave – it turns them soggy. Instead, pop them in a 375°F oven or air fryer for 5 minutes. They’ll come out nearly as crispy as when first baked!
Nutritional Information for Crispy Homemade Baked Chicken Tenders
Now, I’m no nutritionist, but here’s the scoop on what’s in these golden beauties! Each serving (about 3-4 tenders) comes in around 280 calories with a solid 30g of protein to keep you full. The Parmesan and olive oil add just enough good fats (10g total) without going overboard. Keep in mind these numbers can vary based on your exact ingredients – my neighbor’s organic chicken and homemade breadcrumbs might differ from your grocery store finds. But compared to deep-fried versions? You’re saving loads of calories and fat while keeping all that crispy deliciousness!
FAQ About Crispy Homemade Baked Chicken Tenders
I’ve gotten so many questions about these tenders over the years – here are the ones that pop up most often!
Can I use chicken breast instead of tenders?
Absolutely! Just slice boneless, skinless breasts into strips about 1-inch thick. They might need an extra minute or two in the oven since they’re thicker than pre-cut tenders.
Why are my tenders coming out soggy?
Oh honey, I’ve been there! The usual culprits are: not patting the chicken dry first, overcrowding the baking sheet (they steam instead of crisp), or skipping the flip halfway through. Also – don’t skip that olive oil drizzle!
Can I make these ahead of time?
You bet! Coat the tenders up to 4 hours before baking and keep them refrigerated on a parchment-lined tray. Just add a couple extra minutes to the bake time since they’ll be cold from the fridge.
What’s the best dipping sauce?
My personal favorite is a spicy honey mustard (just mix Dijon with honey and a dash of hot sauce), but ranch, barbecue, or even sweet chili sauce all work beautifully. Let your taste buds lead the way!

Crispy Homemade Baked Chicken Tenders: 30-Minute Golden Magic
- Total Time: 35 mins
- Yield: 4 servings 1x
- Diet: Low Fat
Description
Crispy homemade baked chicken tenders are a healthier alternative to fried chicken. They are easy to make and perfect for a quick meal.
Ingredients
- 1 lb chicken tenders
- 1 cup breadcrumbs
- 1/2 cup grated Parmesan cheese
- 1 tsp garlic powder
- 1 tsp paprika
- 1/2 tsp salt
- 1/2 tsp black pepper
- 2 eggs
- 1/4 cup milk
- 1 tbsp olive oil
Instructions
- Preheat oven to 400°F (200°C).
- Mix breadcrumbs, Parmesan cheese, garlic powder, paprika, salt, and pepper in a bowl.
- Whisk eggs and milk in another bowl.
- Dip each chicken tender in the egg mixture, then coat with the breadcrumb mix.
- Place tenders on a baking sheet lined with parchment paper.
- Drizzle olive oil over the tenders.
- Bake for 20-25 minutes, flipping halfway, until golden and crispy.
- Serve hot with your favorite dipping sauce.
Notes
- For extra crispiness, spray tenders lightly with cooking spray before baking.
- Use panko breadcrumbs for a crunchier texture.
- Store leftovers in an airtight container for up to 3 days.
- Prep Time: 10 mins
- Cook Time: 25 mins
- Category: Main Course
- Method: Baking
- Cuisine: American
Nutrition
- Serving Size: 1 serving
- Calories: 280
- Sugar: 1g
- Sodium: 450mg
- Fat: 10g
- Saturated Fat: 3g
- Unsaturated Fat: 5g
- Trans Fat: 0g
- Carbohydrates: 15g
- Fiber: 1g
- Protein: 30g
- Cholesterol: 120mg