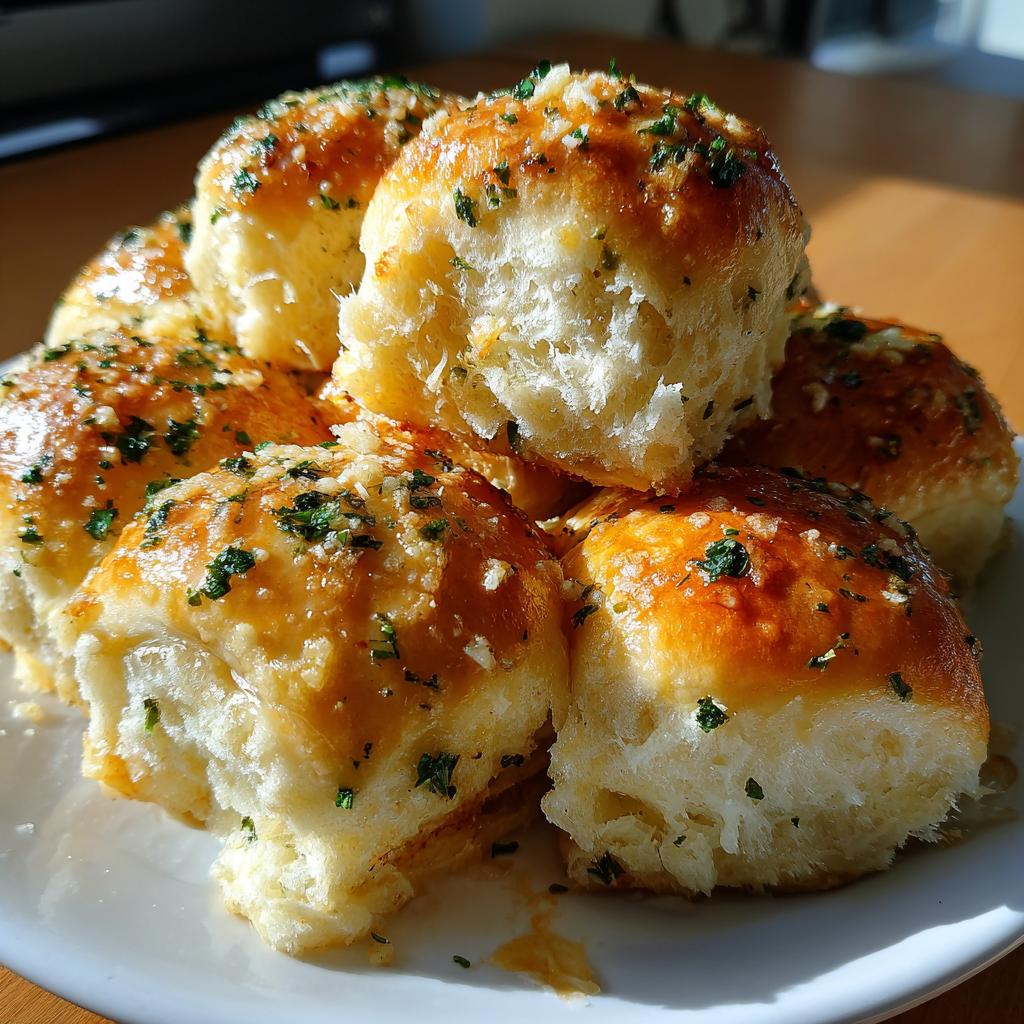
Irresistible Garlic Bread Rolls in Just 5 Steps
Oh, garlic bread rolls—where do I even start? These little golden nuggets of joy have saved me from many a last-minute “what do I serve with dinner?” panic. I remember the first time I made them for a family potluck—my aunt, who usually skips carbs, took three before I even got them to the table! That’s the magic of these rolls. Soft, buttery, and packed with garlicky goodness, they’re perfect alongside pasta, soup, or just on their own when you need a quick, comforting snack. Trust me, once you try these, you’ll never go back to store-bought. The secret? Fresh garlic and a little patience while the dough rises (it’s worth it, I promise!).
Why You’ll Love These Garlic Bread Rolls
Let me tell you why these rolls are about to become your new obsession:
- That irresistible texture – soft and fluffy on the inside, with just the slightest crispness from the garlic butter glaze
- Real garlic flavor – none of that powder nonsense, we’re using fresh minced garlic that makes your kitchen smell amazing
- Surprisingly easy – if you can mix ingredients and wait patiently (the hardest part!), you can make these
- Versatile little miracles – fancy enough for dinner parties, casual enough for weeknight spaghetti
- That golden finish – the Parmesan-parsley topping gives them that bakery-worthy look with zero fuss
Honestly? The hardest part is not eating them all straight from the baking tray!
Ingredients for Garlic Bread Rolls
Gather these simple ingredients – I bet you have most already! The magic happens when they all come together:
- 2 cups all-purpose flour (spooned and leveled, don’t pack it!)
- 1 tbsp sugar – just enough to help the yeast do its thing
- 1 tsp salt – trust me, this makes all the flavors pop
- 1 packet active dry yeast (about 2 1/4 tsp if you’re using bulk)
- 3/4 cup warm milk (around 110°F – think baby bottle temperature)
- 2 tbsp melted butter – unsalted is my go-to for baking
- 3 cloves garlic, minced (fresh is best! I’ll never forgive you for using powder here)
- 2 tbsp chopped parsley – flat-leaf Italian if you’re feeling fancy
- 2 tbsp grated Parmesan cheese – the real stuff, not the shaky-can kind
See? Nothing crazy. Just good, honest ingredients that transform into something magical. Pro tip: measure everything before you start – it makes the process so much smoother when you’re not scrambling mid-dough!
Equipment Needed
Don’t worry – no fancy tools required! Here’s what you’ll need to make these garlicky wonders:
- Large mixing bowl (the bigger the better for those dough-rising theatrics)
- Baking tray lined with parchment (or that silicone mat you forgot you had)
- Pastry brush for slathering on that glorious garlic butter (a spoon works in a pinch)
- Kitchen towel to cover your rising dough (my cat once stole mine mid-rise – true story)
That’s it! Unless you count impatient taste-testers as equipment…
How to Make Garlic Bread Rolls
Alright, let’s get our hands doughy! Making these garlic bread rolls is easier than you think – just follow these steps and you’ll be rewarded with golden, garlicky perfection.
Preparing the Dough
First things first – grab that big mixing bowl and whisk together your flour, sugar, salt, and yeast. Now here’s my little trick: make a well in the center and pour in the warm milk and melted butter. Mix it all together with a wooden spoon until it starts looking shaggy – that’s when I ditch the spoon and get my hands in there.
Knead for about 5 minutes right in the bowl (less cleanup!). You’re looking for a smooth dough that springs back when you poke it – not too sticky, not too dry. If it sticks to your fingers, add a sprinkle more flour. Too dry? A teaspoon of warm milk at a time does the trick.
First Rise
Cover the bowl with that kitchen towel (guard it from curious pets!) and let it rest in a warm spot. My favorite place? On top of the fridge where it’s cozy. Let it rise for about 1 hour – you’ll know it’s ready when it’s doubled in size and looks all puffy and proud.
Pro tip: if your kitchen is chilly, turn your oven to the lowest setting for 1 minute, then turn it off and place the bowl inside with the door slightly ajar. Instant proofing box!
Shaping and Baking
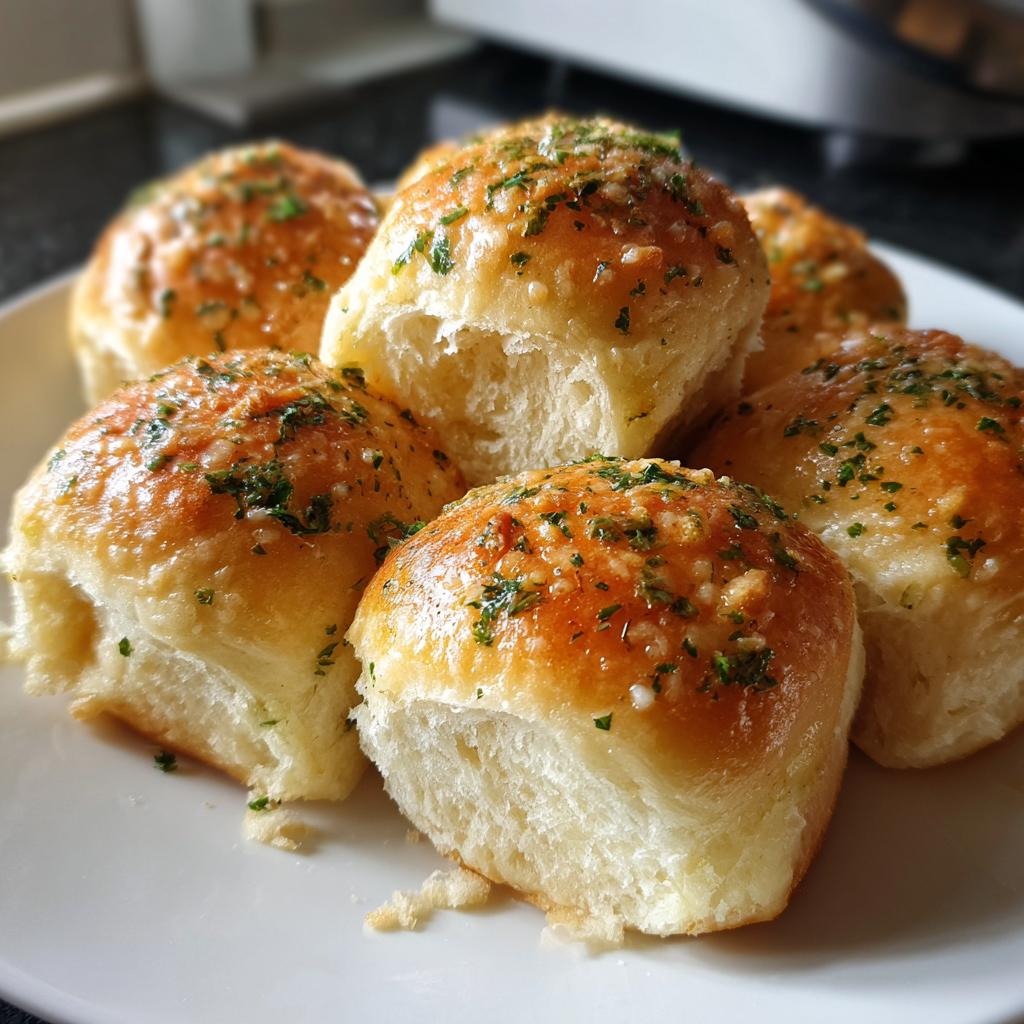
Now the fun part! Punch down the dough (very satisfying) and turn it out onto a lightly floured surface. Divide it into 12 equal pieces – I like to eyeball it, but if you’re a perfectionist, a kitchen scale works great.
Roll each piece into a smooth ball between your palms and place them on your prepared baking tray, about 2 inches apart. They’ll puff up and become best friends in the oven. Let them rest for 15 minutes while your oven preheats to 375°F.
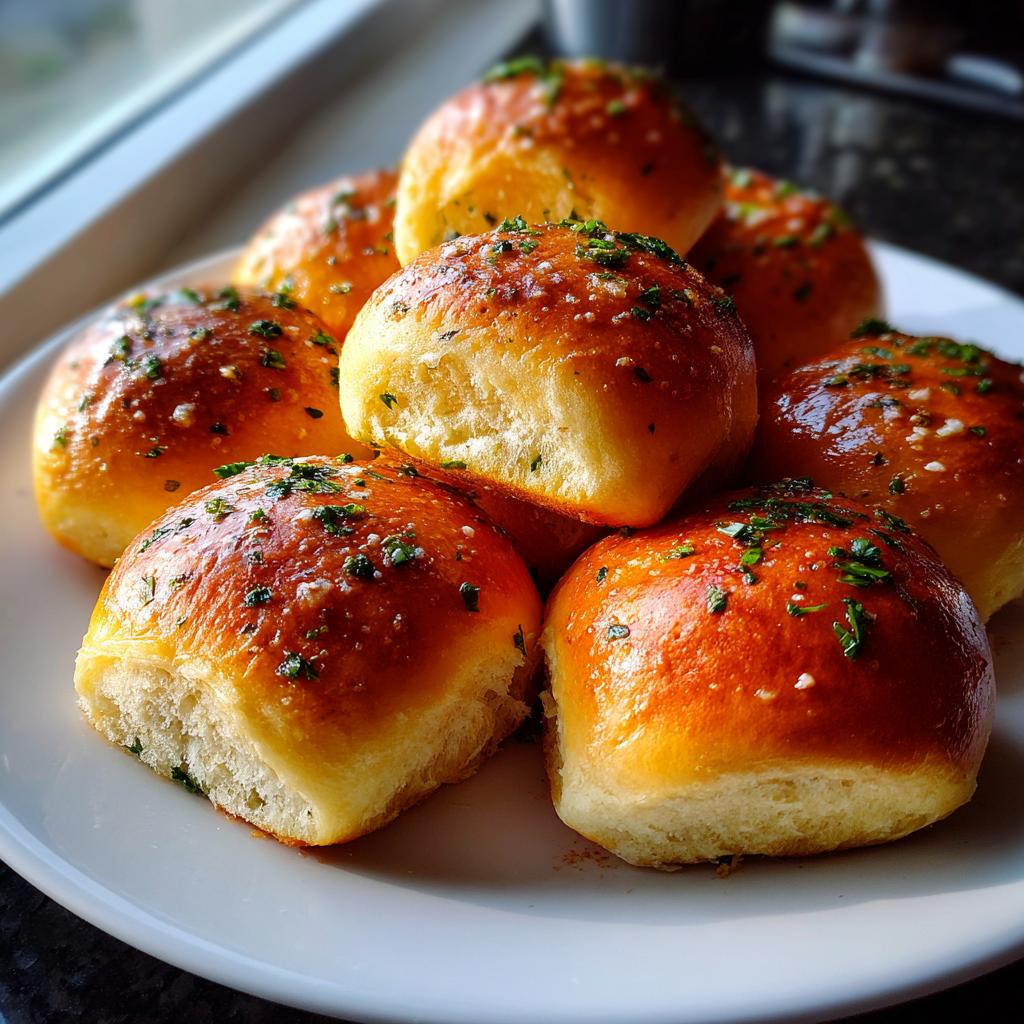
Bake for 15 minutes until they’re golden brown and sound hollow when tapped on the bottom. Your kitchen will smell like heaven – fair warning!
Garlic Butter Topping
While the rolls bake, mix together your minced garlic, parsley, Parmesan, and 2 tablespoons of melted butter. As soon as those beauties come out of the oven, brush this glorious mixture all over them – the heat helps the flavors soak right in.
Don’t be shy with the topping! I usually make extra because… well, accidents happen (read: I eat half of it with a spoon while waiting for the rolls to bake). Let them cool just enough so you don’t burn your mouth, then dig in!

Tips for Perfect Garlic Bread Rolls
After making these rolls more times than I can count (okay, maybe I can count—but not when I’m eating them warm!), I’ve picked up some foolproof tricks:
- Garlic matters: Fresh minced garlic makes all the difference! If you must use jarred, drain it well—no one wants soggy rolls.
- Temperature check: If your milk is too hot, it’ll kill the yeast. Test it on your wrist like baby formula—just warm, not scorching.
- Oven quirks: Every oven lies. Mine runs hot, so I start checking at 12 minutes. Look for golden tops, not dark brown!
- Butter timing: Brush the garlic butter while rolls are piping hot—it soaks in better and gives that glossy finish.
- Storage secret: They’re best fresh, but if you must save some, freeze before adding topping—refresh with butter when reheating.
Remember—the first batch might not be perfect, but even “ugly” garlic bread rolls taste incredible!
Serving Suggestions
Oh, the possibilities! These garlic bread rolls shine brightest when they’re still warm from the oven – trust me, half will disappear before they even hit the table. For perfect pairings:
- Dunk them into creamy tomato soup – my ultimate comfort food combo
- Serve alongside spaghetti carbonara – because you can never have too much garlic
- Pack them in lunches with hearty stews – they stay surprisingly soft for hours
- Enjoy solo with extra garlic butter (no judgment – I do this at least twice a week)
Honestly? They’re so good, they don’t really need an excuse – just a napkin for all that buttery goodness!
Storage and Reheating
Here’s the sad truth—these garlic bread rolls rarely last long enough to store! But when they do (miracle of miracles), wrap them tightly in foil or stash them in an airtight container at room temp for up to 2 days. To revive that just-baked magic, pop them in a 350°F oven for 5 minutes. For longer storage, freeze before adding the garlic butter—just brush on fresh topping when reheating. Pro tip: Splash a few drops of water on frozen rolls before warming—steam brings back the softness!
Garlic Bread Rolls Variations
Once you’ve mastered the basic recipe, the fun begins! Here are my favorite ways to mix things up:
- Cheese explosion: Fold 1/2 cup shredded mozzarella into the dough before shaping—melty pockets of joy!
- Herb garden: Add 1 tsp dried oregano or rosemary to the flour mixture for extra fragrance
- Spicy kick: Mix 1/2 tsp red pepper flakes into the garlic butter—perfect with chili
- Everything bagel: Sprinkle tops with sesame seeds, poppy seeds, and coarse salt before baking
My neighbor swears by adding crispy bacon bits to the dough—I haven’t tried it yet, but I’m definitely not judging! If you want more recipe ideas, check out our blog.
Nutritional Information
Okay, full transparency time—these garlic bread rolls aren’t exactly health food (shocking, I know). But hey, everything in moderation, right? Here’s the scoop per roll, based on my recipe. Remember, nutritional values are estimates and vary based on your exact ingredients and how generous you are with that garlic butter!
- Calories: 120 (worth every single one)
- Carbohydrates: 18g (mostly from that fluffy bread goodness)
- Protein: 3g (who knew bread could pack a little punch?)
- Fat: 4g (thank you, beautiful butter)
- Saturated Fat: 2g (the delicious kind, obviously)
- Sugar: 2g (just enough to make the yeast happy)
- Sodium: 150mg (salt makes the world go ’round)
- Fiber: 1g (hey, garlic counts as a vegetable, right?)
If you’re watching certain nutrients, you can tweak the recipe—try whole wheat flour for more fiber, or reduce the butter slightly (but why would you?). Personally, I believe life’s too short to skip the garlic butter topping—but that’s just me!
Frequently Asked Questions
Over the years, I’ve gotten so many questions about these garlic bread rolls—some from friends, some from family, and some from my own puzzled face staring at the dough at 1 AM. Here are the answers to the most common ones:
Can I use garlic powder instead of fresh garlic?
Oh honey, no—not if you want the real magic! Fresh minced garlic gives that incredible aroma and flavor that powder just can’t match. The moisture in fresh garlic also helps distribute the flavor better. That said, in a true emergency (we’ve all been there), use 1/4 tsp garlic powder per fresh clove—but I’ll know, and I’ll be disappointed in you.
How long do the rolls stay fresh?
They’re best eaten within 2 hours of baking (not that they usually last that long in my house). Store leftovers in an airtight container for up to 2 days at room temperature. To revive them, wrap in foil and warm in a 350°F oven for 5 minutes. They freeze surprisingly well too—just skip the garlic butter topping before freezing and add it fresh when reheating.
Can I make the dough ahead of time?
Absolutely! After the first rise, you can punch down the dough, cover tightly, and refrigerate for up to 24 hours. When ready to bake, let it sit at room temp for 30 minutes before shaping and baking. The cold slow-rise actually develops more flavor—bonus!
Why didn’t my dough rise properly?
First, don’t panic—I’ve been there! Usually it’s one of three things: your yeast was old (test it in warm water with a pinch of sugar—it should bubble), your milk was too hot and killed the yeast, or your rising spot wasn’t warm enough. Next time, try the oven trick I mentioned earlier!
Can I use instant yeast instead of active dry?
Yes! Just skip the sugar in the dough (instant yeast doesn’t need it to activate) and reduce the rise time by about 15 minutes since instant yeast works faster. The results are nearly identical—I’ve used both depending on what’s in my pantry.
Share Your Feedback
I’d love to hear how your garlic bread rolls turned out! Did you stick with the classic version or try any fun variations? Maybe you discovered a brilliant new twist I haven’t thought of yet (if so, I’m totally stealing it). Drop me a comment below with your experience – the good, the bad, and the “why did I eat four of these before dinner?” moments. Your notes help me tweak the recipe and make it even better for everyone. And if you snapped a photo of your golden creations, well… let’s just say my Instagram DMs are always open for carb appreciation! You can also see more of my culinary adventures on Pinterest.
Print
Irresistible Garlic Bread Rolls in Just 5 Steps
- Total Time: 1 hour 30 minutes
- Yield: 12 rolls 1x
- Diet: Vegetarian
Description
Garlic bread rolls are soft, fluffy rolls infused with garlic butter, perfect as a side dish or snack.
Ingredients
- 2 cups all-purpose flour
- 1 tbsp sugar
- 1 tsp salt
- 1 packet active dry yeast
- 3/4 cup warm milk
- 2 tbsp melted butter
- 3 cloves garlic, minced
- 2 tbsp chopped parsley
- 2 tbsp grated Parmesan cheese
Instructions
- Mix flour, sugar, salt, and yeast in a bowl.
- Add warm milk and melted butter, knead into a dough.
- Let the dough rise for 1 hour.
- Roll the dough into small balls and place on a baking tray.
- Bake at 375°F for 15 minutes.
- Mix minced garlic, parsley, and Parmesan with melted butter.
- Brush the garlic butter mixture over the warm rolls.
- Serve immediately.
Notes
- Use fresh garlic for best flavor.
- Let the dough rise in a warm place.
- Adjust baking time based on your oven.
- Prep Time: 1 hour 15 minutes
- Cook Time: 15 minutes
- Category: Bread
- Method: Baking
- Cuisine: Italian
Nutrition
- Serving Size: 1 roll
- Calories: 120
- Sugar: 2g
- Sodium: 150mg
- Fat: 4g
- Saturated Fat: 2g
- Unsaturated Fat: 1g
- Trans Fat: 0g
- Carbohydrates: 18g
- Fiber: 1g
- Protein: 3g
- Cholesterol: 10mg