Back-to-School Homemade Twinkies: 1 Bite Will Spark Childhood Joy
Remember that golden sponge cake with the creamy center you’d trade your carrot sticks for in the lunchroom? That’s what these homemade Twinkies bring back—pure lunchbox nostalgia! I still smile thinking about how my mom would sneak one into my backpack on test days as a little “you got this” treat. Now, I make them for my own kids, and let me tell you, watching their eyes light up when they unzip their lunch bags is everything. These aren’t just snacks; they’re edible happiness—softer than the store-bought kind, with a marshmallowy filling that’s downright dreamy. Best part? You probably have all the ingredients in your pantry right now.
Why You’ll Love These Back-to-School Homemade Twinkies
Trust me, these aren’t just any snack—they’re little golden pockets of joy that’ll make you the lunchbox hero. Here’s why they’re absolutely irresistible:
- Pure nostalgia in every bite – that classic cream-filled sponge cake taste, but even better because you made it with love
- Kid-approved magic – my picky eater actually asks for these (and that’s saying something!)
- Easier than you’d think – no fancy skills needed, just a bowl and some elbow grease
- Lunchbox perfection – they stay soft for days and fit perfectly next to a juice box
- Customizable fun – add food coloring to the filling for school spirit days!
Seriously, one batch and you’ll be hooked. The way the house smells while they bake? Absolute childhood-in-a-pan vibes. If you’re looking for more fun baking ideas, check out my blog for other treats!
Ingredients for Back-to-School Homemade Twinkies
Grab these simple ingredients—you might already have most of them! I like to line everything up like a little baking parade before I start. Pro tip: measure your flour by spooning it into the cup and leveling it off (no packing!) for the perfect light texture.
- Dry Ingredients
- 1 cup all-purpose flour (the backbone of our fluffy cake!)
- 1/2 cup granulated sugar (not packed—just pour it in)
- 1 teaspoon baking powder (fresh is key—check the date!)
- 1/4 teaspoon salt (balances the sweetness just right)
- Wet Ingredients
- 1/4 cup whole milk (room temp blends smoother)
- 1/4 cup water (yep, water—trust me)
- 2 tablespoons vegetable oil (or melted butter for extra richness)
- 1 large egg (give it a quick whisk before adding)
- 1/2 teaspoon pure vanilla extract (the good stuff makes a difference)
- Cream Filling
- 1/2 cup marshmallow fluff (the sticky heart of the operation)
- 1/4 cup softened butter (not melted—just slightly squishy)
- 1/2 cup powdered sugar (sift it to avoid lumps)

Equipment You’ll Need
Don’t worry – you don’t need fancy gadgets! Just grab these basics from your kitchen:
- A Twinkie mold (or small loaf pan works in a pinch)
- 2 mixing bowls (one for dry, one for wet ingredients)
- A whisk and rubber spatula
- Piping bag with round tip (or plastic bag with corner snipped off)
- Wooden skewer (for poking those perfect cream tunnels)
That’s it – no special equipment required! See? I told you this was easy.
How to Make Back-to-School Homemade Twinkies
Okay, let’s get to the fun part! Making these little golden gems is easier than remembering your locker combination. Follow these steps and you’ll have perfect Twinkies that’ll make the lunchroom jealous.
Preparing the Batter
First things first – preheat that oven to 350°F (175°C). Now, grab two bowls. In the first, whisk together all your dry ingredients – flour, sugar, baking powder, and salt. In the second bowl, mix your wet ingredients – milk, water, oil, egg, and vanilla. Slowly pour the wet into the dry while stirring gently. You want a smooth batter with no lumps, but don’t overmix it! Think of it like folding a letter – gentle but thorough.
Baking and Cooling
Now, grease your Twinkie mold or small loaf pan really well (I use butter and a light dusting of flour). Fill each cavity only halfway – these babies rise like crazy! Bake for 12-15 minutes until they’re golden brown and spring back when lightly touched. Let them cool completely in the pan – I know it’s hard to wait, but warm cakes will melt your filling into a gooey mess!
Making the Cream Filling
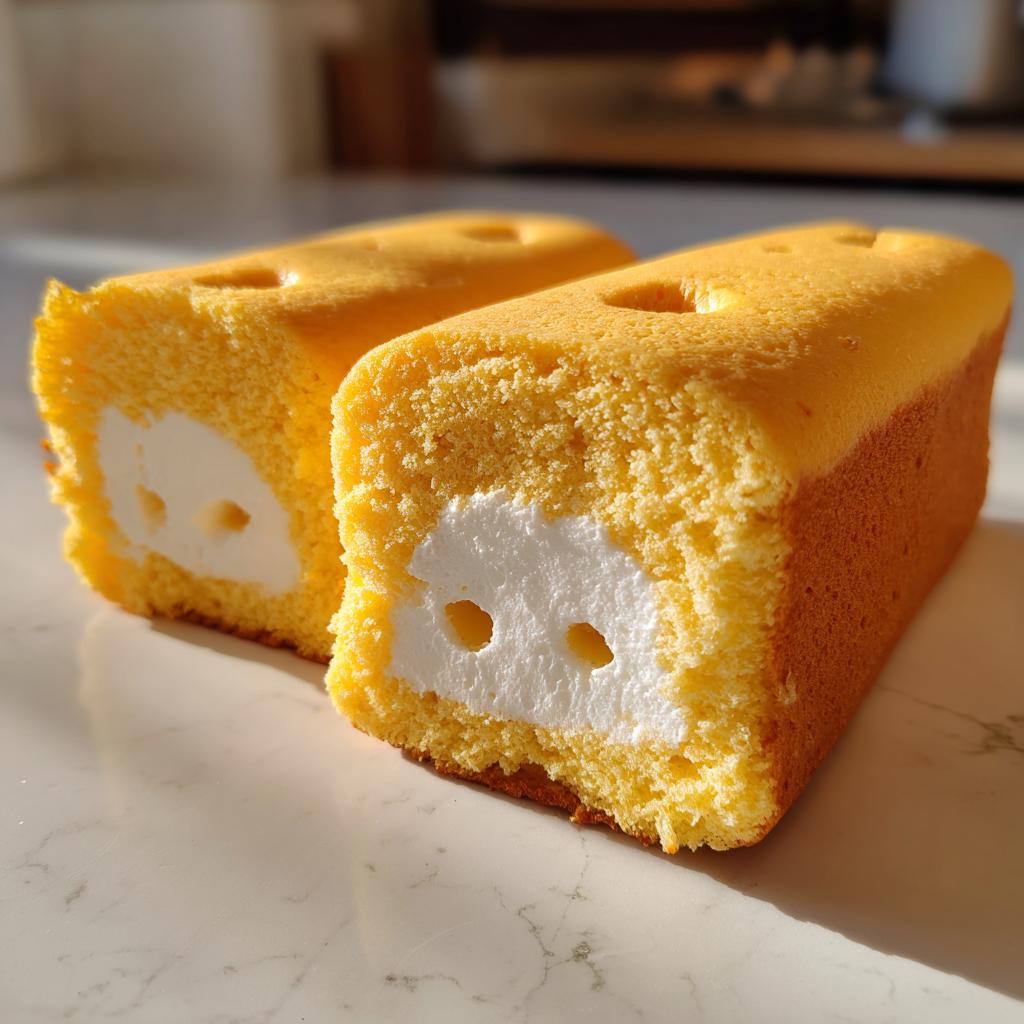
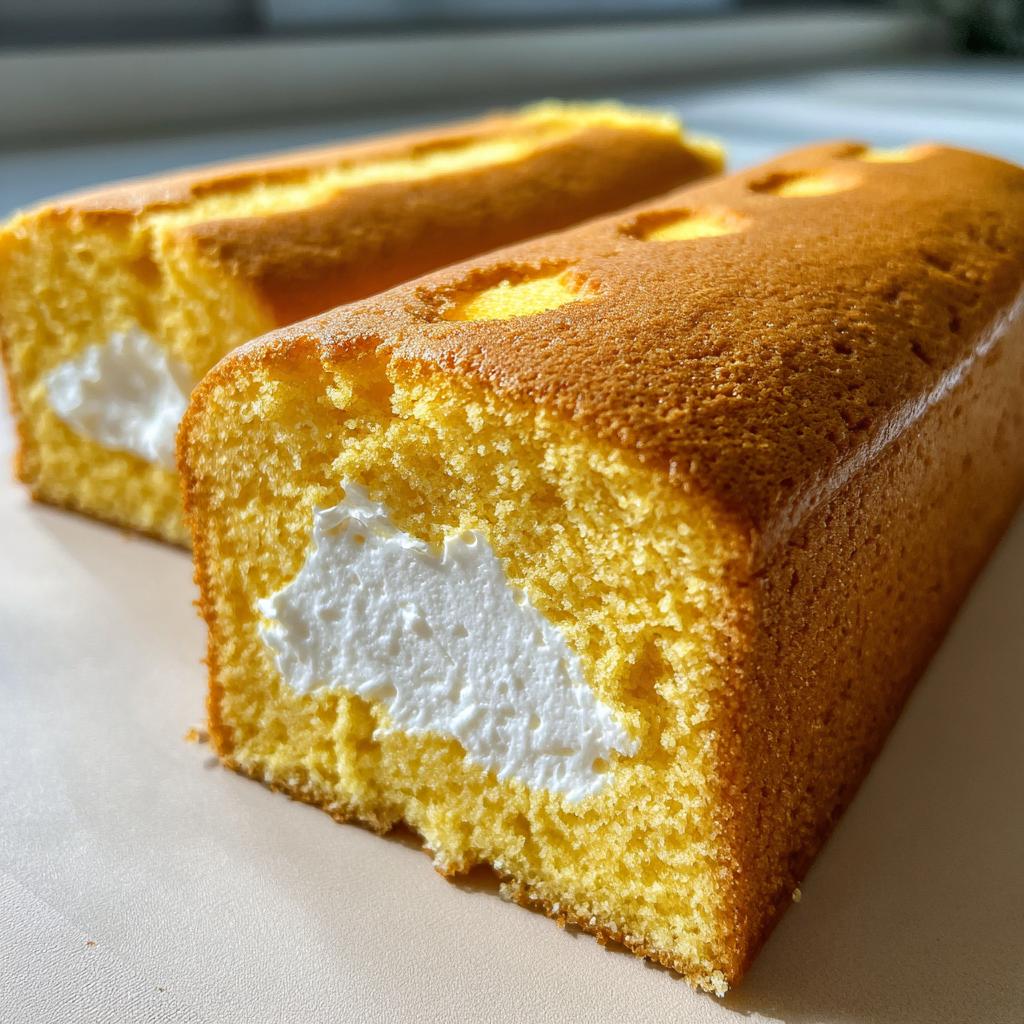
While your cakes cool, whip up the dreamy filling. Beat together the marshmallow fluff and softened butter until smooth. Gradually add powdered sugar until it’s light and fluffy – about 2 minutes. Transfer to a piping bag with a round tip (or a plastic bag with the corner snipped off). Poke three holes in each cake bottom with a skewer, then pipe in that creamy goodness until they plump up slightly. Wipe away any excess, and voila – homemade Twinkie magic!
Tips for Perfect Back-to-School Homemade Twinkies
After making dozens of batches (some more successful than others!), I’ve picked up a few tricks to guarantee Twinkie perfection every time:
- Skewer magic: Poke holes from the BOTTOM – it hides the entry points and gives you better control over filling
- Room temp matters: Let your egg and milk sit out for 15 minutes – cold ingredients make dense cakes
- Lighter option: Cut the sugar in half and add 1 mashed banana to the batter – kids won’t notice the difference!
- Storage secret: Keep them in an airtight container with a slice of bread – it prevents drying out (weird but works!)
- Freezer-friendly: Wrap individually in foil and freeze for up to a month – perfect for busy school mornings
Oh, and if your first batch isn’t bakery-perfect? That’s okay! Even my “ugly” ones disappear fast. You can find more baking inspiration on my Pinterest board!
Serving and Storing Back-to-School Homemade Twinkies
These homemade Twinkies are absolute lunchbox heroes! I love tucking them into parchment paper sleeves – it makes them feel extra special. They’ll stay fresh in an airtight container for up to 3 days (if they last that long!). For an after-school treat, try them slightly chilled – the cream filling gets extra dreamy. Pro tip: Pack them on top of other lunch items so they don’t get squished!
Nutritional Information
Each homemade Twinkie clocks in at about 150 calories – way better than the store-bought version if you ask me! Here’s the breakdown per cake: 12g sugar (we can all use a little sweetness during back-to-school season), 6g fat, and 2g protein. Now, these numbers might wiggle a bit depending on your exact ingredients – like if you use whole milk versus 2%. But honestly? When my kids are grinning with cream filling on their faces, I’m not counting grams – I’m counting memories!
Frequently Asked Questions
Q1. Can I freeze these homemade Twinkies?
Absolutely! Wrap them individually in foil or plastic wrap, then pop them in a freezer bag for up to a month. Thaw at room temperature when the craving hits—they’ll taste just as fresh as day one. My kids love finding these in their lunchboxes as a special surprise!
Q2. What if I don’t have a Twinkie mold?
No worries—a small loaf pan works great! Just pour the batter into greased mini loaf pans (or even a muffin tin) and adjust baking time. The shape might be different, but that creamy center will still transport you right back to childhood. If you need more baking tips, check out my coffee cake recipe for another easy win.
Q3. Can I make these ahead for school lunches?
You bet! These actually taste better on day two when the flavors have mingled. I usually bake a batch Sunday night—they’re perfect for packing all week. Just keep them in an airtight container so they stay soft.
Q4. My filling is too runny—what went wrong?
Oh honey, I’ve been there! Make sure your butter is softened but not melted, and whip that filling good and proper. If it’s still loose, add a bit more powdered sugar until it holds its shape. Pro tip: Chill the filling for 15 minutes before piping if your kitchen’s warm.
Q5. Can I use something besides marshmallow fluff?
Sure thing! Swap in vanilla pudding or whipped cream for a different twist. But fair warning—my kids swear the marshmallow version is the only “real” Twinkie. Experiment and see what your family prefers! For more dessert ideas, take a look at this sweet treat recipe.

Share Your Back-to-School Homemade Twinkies
I’d love to see your Twinkie creations! Snap a pic of those golden beauties and tag me—nothing makes me happier than seeing kids (and grown-ups!) grinning with cream-filled treats. Your reviews make my day, so don’t be shy!
Print
Back-to-School Homemade Twinkies: 1 Bite Will Spark Childhood Joy
- Total Time: 30 minutes
- Yield: 12 Twinkies 1x
- Diet: Vegetarian
Description
Make these homemade Twinkies for a fun and nostalgic back-to-school treat. They’re soft, creamy, and perfect for lunchboxes or after-school snacks.
Ingredients
- 1 cup all-purpose flour
- 1/2 cup sugar
- 1 tsp baking powder
- 1/4 tsp salt
- 1/4 cup milk
- 1/4 cup water
- 2 tbsp vegetable oil
- 1 egg
- 1/2 tsp vanilla extract
- 1/2 cup marshmallow fluff
- 1/4 cup butter, softened
- 1/2 cup powdered sugar
Instructions
- Preheat oven to 350°F. Grease a Twinkie mold or small loaf pan.
- Mix flour, sugar, baking powder, and salt in a bowl.
- Add milk, water, oil, egg, and vanilla. Stir until smooth.
- Pour batter into the mold, filling halfway. Bake for 12-15 minutes.
- Let cakes cool completely.
- Beat marshmallow fluff, butter, and powdered sugar until creamy.
- Use a piping bag to fill each cake with the cream.
Notes
- Store in an airtight container for up to 3 days.
- Use a skewer to poke holes for easier filling.
- For a lighter version, reduce sugar by half.
- Prep Time: 15 minutes
- Cook Time: 15 minutes
- Category: Dessert
- Method: Baking
- Cuisine: American
Nutrition
- Serving Size: 1 Twinkie
- Calories: 150
- Sugar: 12g
- Sodium: 85mg
- Fat: 6g
- Saturated Fat: 2.5g
- Unsaturated Fat: 3g
- Trans Fat: 0g
- Carbohydrates: 22g
- Fiber: 0.5g
- Protein: 2g
- Cholesterol: 25mg