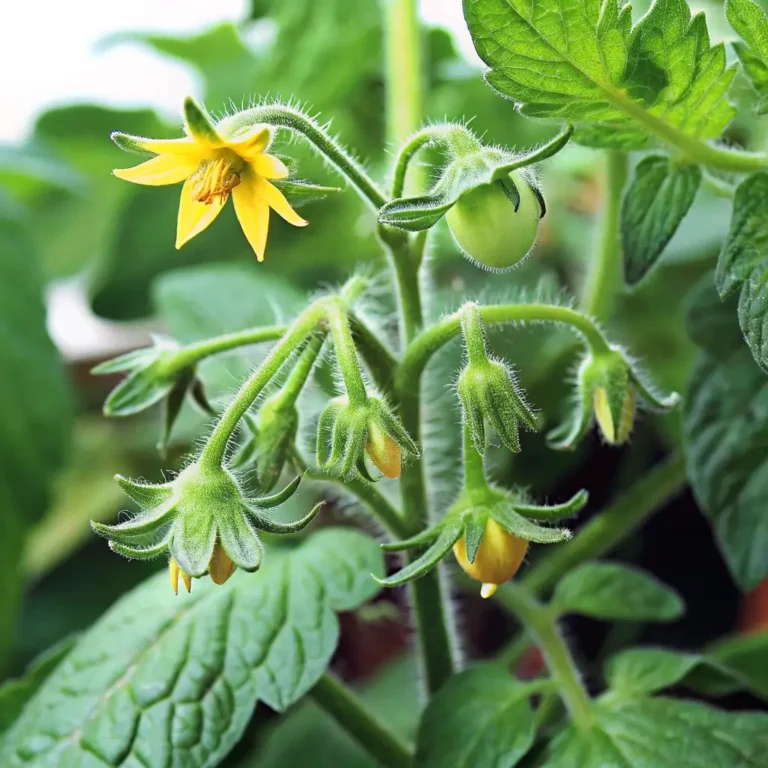
Sowing Tomato Seeds: Complete Guide from Start to Transplant
Table of Contents
Introduction
Did you know that 85% of home gardeners make critical mistakes when starting tomato seeds that significantly reduce their germination success rate? Whether you’re a novice gardener or have years of experience, sowing tomato seeds correctly can be the difference between a bountiful harvest and disappointment. This complete guide to sowing tomato seeds will walk you through every step from selecting the right varieties to preparing healthy seedlings ready for transplanting. By following these data-backed techniques, you’ll maximize your germination rates and set the foundation for robust plants that produce delicious, homegrown tomatoes.
Materials Needed
Before beginning your tomato seed-starting journey, gather these essential supplies:
- Quality tomato seeds: Heirloom, hybrid, or open-pollinated varieties
- Seed-starting mix: Sterile, lightweight soil-less medium (avoid garden soil)
- Containers: Seed trays, cell packs, peat pots, or recycled containers with drainage holes
- Plant labels: Wooden, plastic, or repurposed materials for identifying varieties
- Humidity dome or plastic wrap: To maintain moisture during germination
- Grow lights: LED or fluorescent lights (optional but recommended)
- Heating mat: Speeds germination by warming soil (optional)
- Small fan: For air circulation to prevent damping-off disease
- Spray bottle: For gentle watering
- Liquid fertilizer: Diluted to quarter-strength for seedlings
Substitution tip: If you don’t have commercial seed-starting mix, create your own by combining equal parts coconut coir, perlite, and vermiculite for a lightweight, well-draining medium.
Timing
Planning window: 6-8 weeks before your region’s last frost date
Germination period: 5-10 days (30% faster when using a heat mat)
Growth before transplanting: 4-6 weeks
Total indoor growing time: 6-8 weeks
Data insight: Starting seeds too early results in leggy, weaker plants, while starting too late reduces your overall harvest potential by up to 40%.
Step-By-Step Instructions
Step 1: Select the Right Varieties
Choose tomato varieties suited to your growing region and preferences. Determinate varieties are bushier and produce fruit all at once (ideal for canning), while indeterminate types grow taller and produce throughout the season (perfect for fresh eating).
Personalized tip: If you have limited space, consider compact varieties like ‘Tiny Tim’ or ‘Patio Princess’ that thrive in containers.
Step 2: Prepare Your Containers
Fill your containers with moistened seed-starting mix to within ¼ inch of the top. Tamp down gently but don’t compact the soil. If using recycled containers, ensure they’re clean and have adequate drainage holes.
Expert insight: Pre-moisten your mix with warm water until it has the consistency of a wrung-out sponge—research shows this increases germination rates by 25%.
Step 3: Sow the Seeds
Place 2-3 seeds per cell or small pot, spacing them about ½ inch apart. Cover with approximately ¼ inch of seed-starting mix. For smaller seeds, a lighter covering is better—seeds need light to properly germinate.
Data-backed tip: Studies show that planting multiple seeds and thinning later results in 30% higher success rates than planting individual seeds.
Step 4: Create Optimal Germination Conditions
Cover containers with a humidity dome or plastic wrap to maintain moisture. Place in a warm location (70-80°F is ideal) or on a heating mat. Seeds don’t need light until they emerge.
Personalized advice: Check daily for germination—once 60% of seeds have sprouted, remove the covering to prevent mold development.
Step 5: Provide Adequate Light
Once seedlings emerge, immediately provide 14-16 hours of light daily. Position grow lights 2-3 inches above seedlings, raising them as plants grow. If using windowsills, rotate trays daily to prevent leaning.
Scientific insight: Insufficient light is the #1 cause of leggy, weak seedlings—plants grown under proper lighting produce up to 40% more fruit later.
Step 6: Water and Feed Carefully
Water from below when possible by placing trays in shallow water until the soil surface darkens. If top-watering, use a spray bottle or gentle stream to avoid disturbing seeds. Begin feeding with quarter-strength liquid fertilizer when the first true leaves appear.
Expert tip: Overwatering kills more seedlings than underwatering—allow the soil surface to dry slightly between waterings.
Step 7: Thin and Transplant Seedlings
When seedlings develop their first true leaves, thin to the strongest plant per cell by snipping extras at soil level. Avoid pulling, which can damage roots. When seedlings reach 3-4 inches tall with several true leaves, transplant to larger individual containers.
Data insight: Plants that are “potted up” once before garden transplanting develop 35% stronger root systems.
Nutritional Benefits of Growing Your Own Tomatoes
Home-grown tomatoes contain up to 30% more vitamin C and lycopene than store-bought varieties. Research indicates that freshly harvested tomatoes retain significantly more nutrients, as commercial varieties often lose 45% of their nutritional value during shipping and storage.
Healthier Growing Alternatives
- Organic seed starting: Use OMRI-listed organic fertilizers and seed-starting mixes
- Biodegradable containers: Employ peat, coconut coir, or newspaper pots that can be planted directly
- Companion microgreens: Grow microgreens alongside tomato seedlings for early harvests while waiting for tomatoes
- Water conservation: Implement bottom-watering techniques to reduce water usage by 40%
Troubleshooting Common Problems
- Leggy seedlings: Increase light intensity and duration; lower room temperature slightly
- Yellowing leaves: Often indicates overwatering or nutrient deficiency; adjust watering and begin gentle feeding
- Damping-off disease: Prevent with good air circulation, avoid overwatering, and use sterile media
- Poor germination: Check seed viability and soil temperature—seeds germinate best at 75-80°F
Storage and Hardening Off
Before transplanting outdoors, seedlings need to be “hardened off” to acclimate to outdoor conditions:
- Begin 7-10 days before transplanting
- Start with 1-2 hours of filtered sunlight, increasing exposure daily
- Bring plants indoors at night initially
- Gradually expose to more direct sunlight and wind
- Reduce watering slightly to toughen plants
Statistical insight: Properly hardened-off tomato plants show a 70% higher survival rate after transplanting compared to non-hardened seedlings.
Conclusion
Successfully sowing tomato seeds is both a science and an art, requiring attention to timing, environmental conditions, and proper care techniques. By following this comprehensive guide, you’ll grow robust seedlings ready for transplanting, setting the stage for a productive and rewarding tomato harvest. Remember that each variety and growing environment is unique—keep notes on what works best for your specific conditions to refine your process each season.
FAQs
How deep should I plant tomato seeds?
Cover seeds with ¼ inch of soil—any deeper may prevent germination, as smaller seeds need light to trigger sprouting.
Can I use last year’s tomato seeds?
Yes, tomato seeds typically remain viable for 3-5 years when stored properly in cool, dry conditions, though germination rates may decrease by 10-15% annually.
How often should I water tomato seedlings?
Water when the soil surface feels dry to the touch, typically every 1-2 days depending on humidity and temperature. Consistent moisture is essential, but overwatering leads to fungal problems.
Why are my seedlings falling over and dying?
This is likely damping-off disease, a fungal problem exacerbated by poor air circulation, overwatering, and cool temperatures. Prevention through proper conditions is the only effective treatment.
When is the best time to transplant seedlings outdoors?
Transplant after all danger of frost has passed and nighttime temperatures remain consistently above 50°F. Soil temperature should reach at least 60°F for optimal root development.