Key Takeaways
- You can grow delicious beefsteak tomatoes in pots on your patio or balcony with the right techniques.
- Choose a large container with good drainage and nutrient-rich, well-draining soil for your tomatoes.
- Acquire healthy tomato seedlings from a nursery or grow your own from seeds, and transplant them carefully into your containers.
- Provide proper care with adequate sunlight, watering, and nutrition to ensure thriving tomato plants.
- Prune, support, and watch for pests and diseases to maximize your container-grown beefsteak tomato harvest.
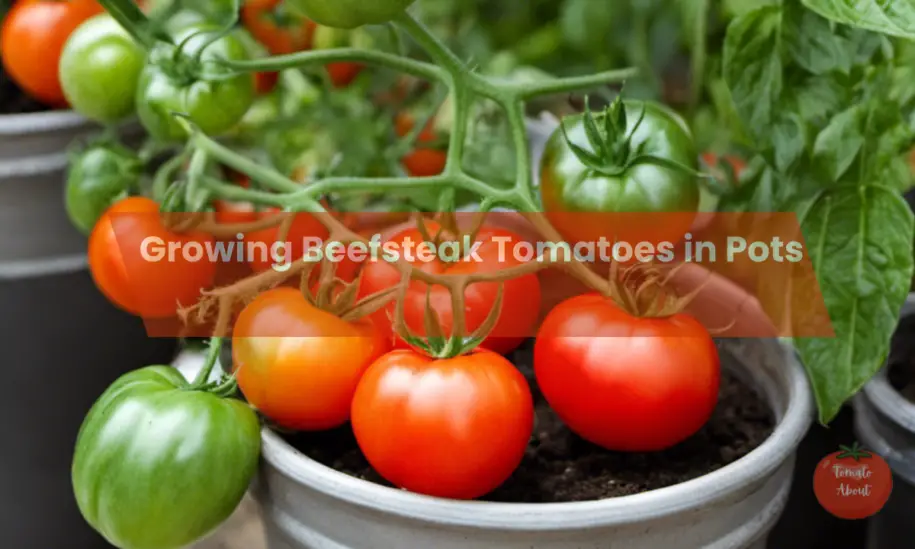
Beefsteak tomatoes are the juiciest, meatiest tomatoes you can grow. With their sweet, robust flavor and large size, they make incredible sandwiches, salads, and snacks. While often grown in gardens, you can also cultivate plump, delicious beefsteak tomatoes in pots.
Growing tomatoes in containers provides flexibility and convenience. With the right techniques, you can yield a prolific beefsteak tomato harvest on a patio, balcony, or any small space.
This comprehensive guide shares pro tips for successfully raising beefsteak tomato plants in pots. Follow these steps and suggestions for mouthwatering homegrown tomatoes.
Choosing the Best Pot for Beefsteak Tomatoes
The first step is selecting an appropriate pot for your beefsteak tomato plants. As beefsteak tomato vines can grow over 6 feet tall, use a large container that provides sufficient room for root development.
Ideally, choose a pot that holds at least 10 gallons of soil. Five-gallon containers also work well. For patio railings and other compact areas, you can use a 3-5 gallon pot, but the plant will need more frequent watering and nutrients.
Make sure your container has drainage holes on the bottom to prevent waterlogged soil. Elevating the pot on pot feet or bricks improves drainage.
Remember that beefsteak tomato plants need a cage or trellis for support. Choose a pot that accommodates a tomato cage or provides a spot to insert a sturdy stake.
You can grow one beefsteak tomato per pot. Choose containers at least 24 inches wide if planting multiple pots on a patio or deck.
Terracotta, plastic, wood, and metal pots all work fine. For best results, use a light-colored pot that won’t absorb excessive heat.
Creating Nutrient-Rich, Well-Draining Soil
When growing tomatoes in containers, the potting soil needs to drain well, yet also retain moisture effectively. It must provide an abundance of key nutrients that tomato plants need.
A high-quality potting mix for vegetables is the best choice for container-grown tomatoes. Look for premixed formulas containing:
- Compost to provide a wide range of essential nutrients, as well as beneficial microorganisms
- Perlite or vermiculite to lighten the texture for improved drainage and aeration
- Peat moss or coconut coir to help retain moisture and nutrients
- Worm castings for an extra nutrient boost, especially nitrogen
- Mycorrhizal fungi help tomato roots absorb more nutrients
You can also easily make your own well-balanced container soil mix at home. An easy homemade recipe is:
- 1 part compost or composted manure
- 1 part peat moss or coconut coir
- 1 part perlite or vermiculite
- 1-2 cups of worm castings per cubic foot of soil
Avoid regular garden soil, as it will become too compacted. Blending in extra perlite or vermiculite at up to 30% of the total volume creates the light, well-aerated texture tomatoes need.
Before planting, work in 1-2 inches of compost or well-aged manure into the top 4-6 inches of soil. This gives young plants an extra nutrient boost early on.
You can further enrich the soil by mixing in a balanced organic fertilizer, tomato-specific fertilizer, or slow-release pellets. Follow package instructions for how much to add per gallon of soil.
Once planted, avoid compacting the soil by stepping around (not in) the pots whenever possible. Adding mulch on top preserves moisture and reduces compaction.
Acquiring Young Beefsteak Tomato Seedlings
Beefsteak tomatoes require a long warm growing season and produce the best harvest when grown from transplants rather than seeds started directly in the pot.
In early spring, you can purchase young tomato seedlings from your local garden nursery or plant store. Choose stocky plants about 4-6 inches tall, avoiding slender or root-bound specimens. Select plants with green, healthy-looking foliage.
Another option is to grow your own tomato seedlings from seed indoors or in a greenhouse. Start seeds 6-8 weeks prior to your target outdoor transplant date, allowing enough time for full root development. Grow the seedlings in a sunny spot or under grow lights. Be sure to harden off plants before transplanting them outside into pots.
Wait until after the average last frost date in spring to transplant mature tomato seedlings into containers outdoors. Plant them when both soil and air temperatures have warmed up to at least 60°F.
Transplanting Tomato Seedlings into Pots
When transferring purchased or homegrown tomato starts into your containers, take care not to damage the main stem and fragile root system.
Gently remove each plant from its original nursery pot or growing cell. Carefully loosen any circled or matted roots around the outside of the root ball so they can easily grow outward into the new container mix.
Dig a hole in the center of the potting soil just a bit larger than each tomato root ball. Set the seedling into the hole and fill the soil around the base, ensuring the entire root system is covered.
Plant tomato seedlings deeply, leaving just the top few sets of leaves exposed above the soil line after burying most of the stem. This deep planting encourages extra root growth along the buried stem section.
After settling your transplants into pots, gently firm the soil around the base and water thoroughly to remove any air pockets. Keep the soil consistently moist but not waterlogged during the first week or two to help seedlings establish.
Caring for Container Tomatoes: Sunlight, Water, and Nutrients
Providing optimal sun exposure, irrigation, and nutrition is key to growing vigorous, thriving tomato plants that yield prolific amounts of fruit. Here are some tips:
Sunlight
- Place containers in a spot receiving at least 6 hours of direct sun daily
- Turn pots for even sunlight exposure
- Supplement with grow lights if sunlight is inadequate
Watering
- Check soil moisture frequently, watering when the top few inches become dry
- Avoid overhead watering to prevent diseases
- Use drip irrigation or water at plant bases
- Add mulch to help retain moisture
Nutrition
- Use a rich potting mix amended with compost and worm castings
- Feed plants every 2-3 weeks with a balanced tomato fertilizer or compost tea
- If using a soilless mix, feed weekly
- Watch for deficiencies and amend the soil as needed
In addition to your regular fertilizing regimen, I also recommend these boosters:
- Worm casting tea – every 2-3 weeks
- Epsom salts – monthly (1 tbsp per gallon of water)
- Fish emulsion – every 2-4 weeks
- Compost or manure tea – monthly
Proper Pruning
Pruning is essential for container beefsteaks to maximize fruit yields and improve air circulation within the dense foliage.
Removing Suckers
The shoots that form in the joints between the main stems and branches are called suckers. Left unattended, they divert energy away from developing fruits.
Pinch off suckers by hand as soon as you spot them when plants are young. For larger suckers on established plants, use pruners to cut them off at their base.
Remove all suckers as they appear except for 2-3 branches that will form the “leaders” of the plant.
Bottom Pruning
Once plants grow larger, prune away all foliage and stems within 6-12 inches of the soil surface. This allows air to flow through the middle of the plant, reducing moisture that fuels diseases.
Tip Pruning
Pinching off 2-4 inches from the tips of the leaders and branches channels the plant’s energy into the fruits rather than more foliage. Do this once 1-2 flower clusters have formed on each branch.
Leaf Removal
Gradually remove leaves that block sunlight from reaching ripening fruits. Prioritize keeping lower leaves over upper leaves for as long as possible, only removing those that obstruct light and airflow.
Support Pruning
Remove branches or suckers that won’t be supported properly by your cages or trellis, ensuring all growth is contained.
In most cases, pruning by pinching with your fingers is sufficient. Clean pruners occasionally in diluted bleach to prevent transmitting diseases.
Supporting Vines for Improved Yields
As your tomato plants grow taller and bushier, train the vines upward using stakes, cages, or trellises. Vertical support improves air circulation and keeps the ripening fruits up off the ground for improved quality.
Tomato cages are very easy to use for container-grown plants. Simply place the cages over plants when they reach about 12-18 inches tall. Gently guide the growing vines through the openings in the cage, securing new growth with soft plant ties if needed. Select tall, sturdy cages that allow plenty of overhead space above your plants’ final height.
Stakes also work very well for supporting beefsteak tomatoes grown in pots. Drive a 5-6 foot tall reinforced garden stake into the soil right next to the plant, taking care not to damage roots. Once the plant is about 12 inches high, gently tie the main stem to the stake using soft plant ties or twine. Continue loosely securing vines at intervals as the plant grows taller.
For extra sturdy support, add wooden crossbars onto tall stakes at different heights to support horizontal vine growth. This allows you to gently train plants and maximize space.
Preventing Common Tomato Pests and Diseases
One benefit of growing tomatoes in containers is reduced issues with soil-dwelling tomato pests and diseases. However, container plants can still be affected by the following problems:
- Aphids – Tiny sucking insects that cluster on stems and leaves; control with horticultural oil spray or strong blasts of water
- Tomato hornworms – Large green caterpillars that quickly defoliate plants and damage fruits; remove by hand or apply Bacillus thuringiensis
- Blossom end rot – A dark leathery rot on the bottom of fruits caused by low calcium uptake and inconsistent watering; amend soil and maintain even moisture
- Early blight – Leaf spots and target-like blotches that can spread to fruits; improve airflow and avoid wetting leaves
- Tomato mosaic virus – Distorted leaf growth and mottling caused by aphids transmitting the virus; control aphids and promptly remove affected plants
Frequently inspect plants and take prompt action at the first signs of pests or diseases to avoid spreading. Selectively removing affected leaves and fruits can often help protect the remaining healthy plant tissues.
Harvesting Beefsteak Tomatoes at Their Flavorful Best
Allowing fruits to fully ripen on the vine results in the best texture, color, and flavor. For container-grown beefsteak tomatoes, the optimal harvest time is when:
- Tomatoes are fully colored with no green patches remaining
- Fruits feel firm yet slightly supple when gently squeezed
- They easily detach from vines with a gentle tug
- The aroma is sweet, fragrant, and tomatoey
Carefully twist ripe tomatoes off of vines by hand to avoid damaging plants during harvest. Cutting fruits from vines using clean, sharp pruners or scissors also works well.
Pick tomatoes as they ripen to encourage ongoing fruit production. During peak harvest, check your container plants daily once fruits start reddening. Never refrigerate freshly picked tomatoes, which negatively affects their taste.
Conclusion
With this comprehensive container growing guide, you now have all the information you need to successfully cultivate incredible beefsteak tomatoes on your patio, balcony, or small space. Follow the tips outlined here to enjoy a prolific harvest of juicy, flavorful beefsteak tomatoes that you’ll love eating fresh in sandwiches, salads, sauces, and more all season long.

